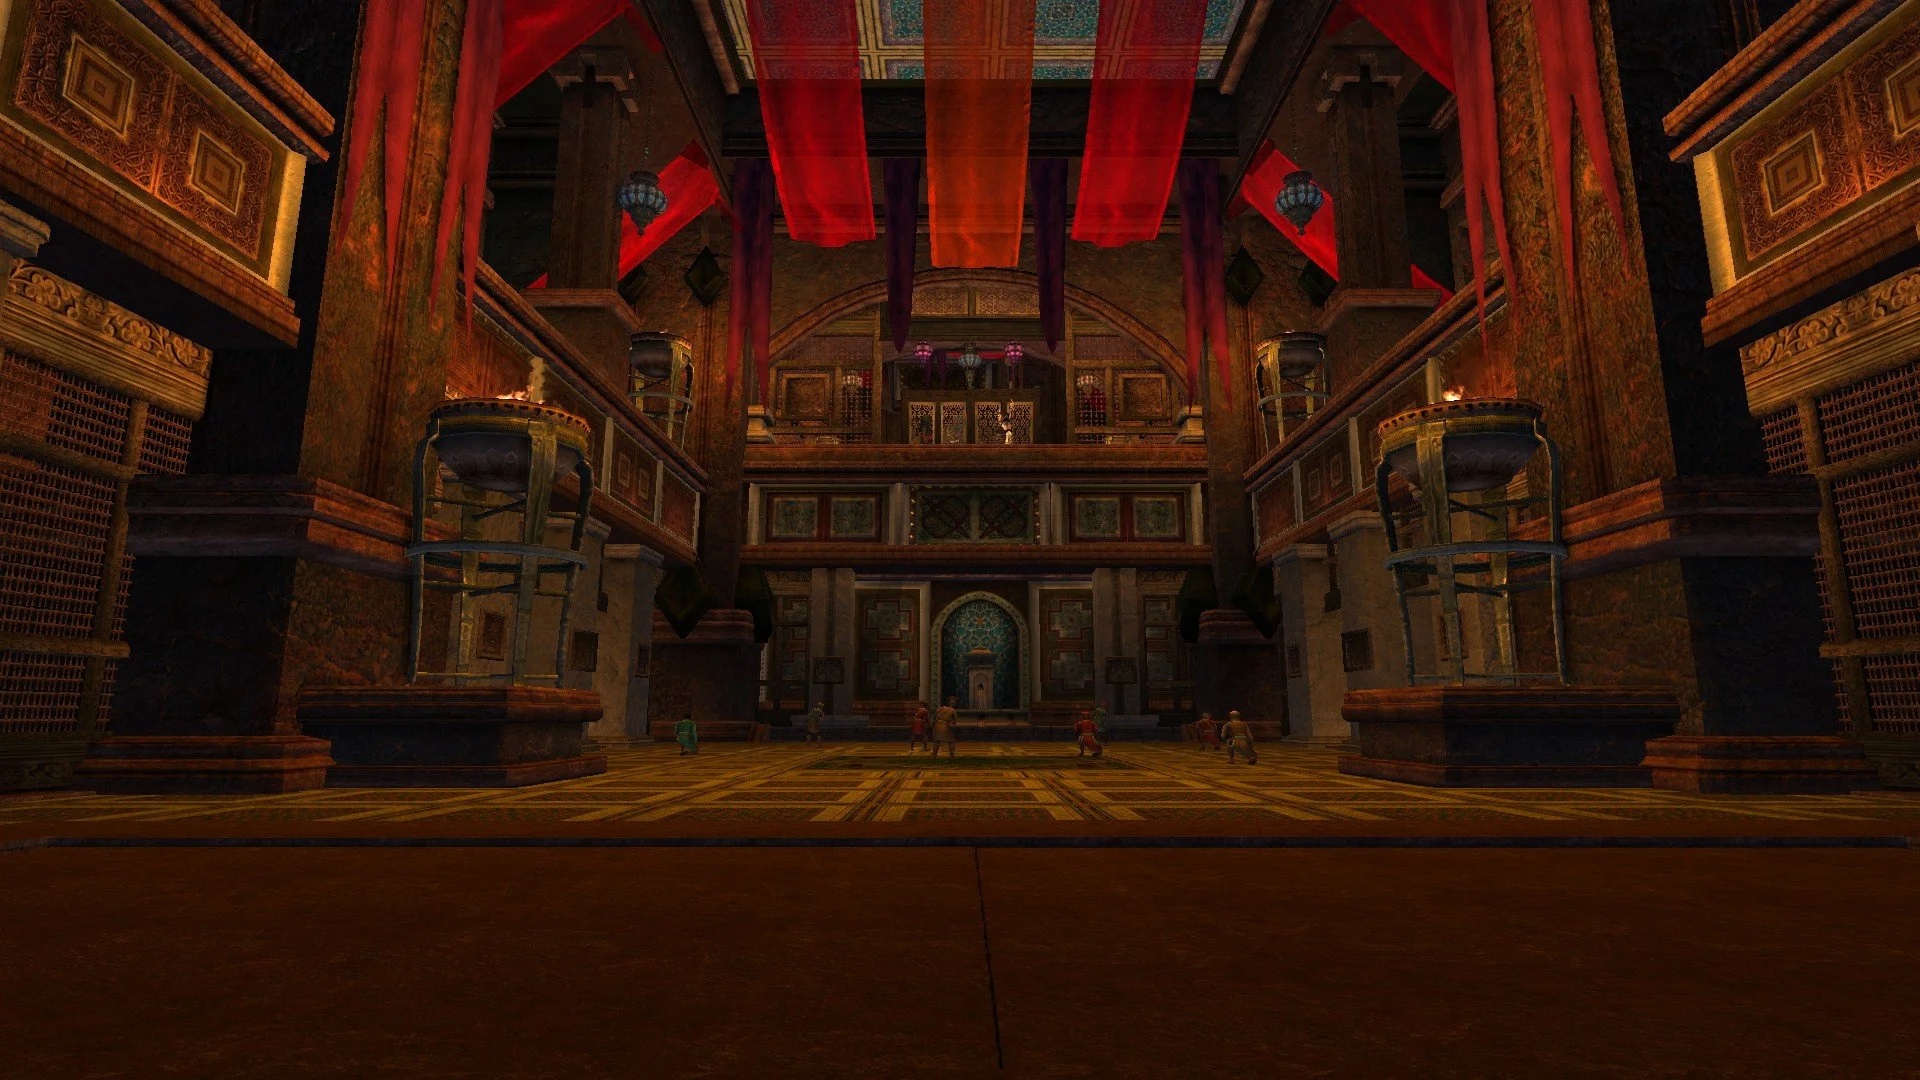
Ekal-nêbi, the Fallen Palace
The palace of Ekal-nêbi is the crown jewel of Emax Dûl, an opulent home to rulers from the kingdom of Nêshak, Nísaka... and now from Ordâkh. Hidden in the background of palace life, Thothril the Entangler, Thardúth of Damudûr, quietly began working her enchantments upon the minds of its inhabitants. Now with soldiers of Mizâdi's alliance at the palace doorstep, she asserts final control over the palace.
Non-Boss Enemies
Enthralled Prisoner
Melee attacker whose melee auto attacks deal Common damage.
Head Crack: melee (3m), standard targeting, deals Common damage and stuns the target for 2s.
Feral Swipe: melee(5m), standard targeting, deals Common damage to all players and pets in a Cone(5m, 45°) .
Enthralled Servant
Melee attacker whose melee auto attacks deal Common damage.
Scream of Madness: 4s interruptible induction, deals Shadow damage to all players within 20m of the caster. This attack is a tactical attack
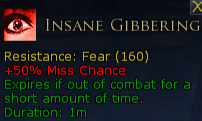
Insane Gibbering: tactical (4m), standard targeting, deals Shadow damage to the target and applies Insane Gibbering (curable, Fear) for 60s. Insane Gibbering grants +50% miss chance.
Bloody Torturer
Melee attacker whose melee auto attacks deal Common damage. Also has a ranged auto attack (20m) that deals Common damage and can be barred from use with an Enrage effect.
Brand Stab: 3s non-interruptible induction, deals Fire damage to all players and pets in an Line (2m wide by 5m long) and applies Hot Brand (curable, Wound) for 15s. This is a tactical attack. Hot Brand deals Fire damage initially and then Fire damage every 3s.
Missing Tooltip
Brand Sweep: tactical, standard targeting, deals Fire damage to all players and pets in a Cone (5m, 45°).
Góramul Sai (interlude)
Melee attacker whose auto attacks deal Common damage. This is not the boss version of Góramul Sai, but rather the mechanics that he uses when faced before the final boss fight.
Smack: melee (5m), standard targeting but can only target pets, deals insanely high Common damage and applies Disregarded until combat ends. Disregarded multiplies the Perceived Threat of the afflicted pet by 0.
This skill is only usable on pets and is a means of not allowing a player pet tank the entity.
Spear Throw {“I cannot abandon Emax Dûl!”}: 5s non-interruptible induction, targets a random player, deals Common damage to all players within the Line (1m wide by 30m long). This is a ranged attack.
Serpent Strike{“I cannot fail the Hûl!”}: 3s non-interruptible induction, targets a random player, deals Common damage to all players within the Cone (90°,5m) and applies Serpent Strike (curable, Wound) for 30s, dealing Common damage initially and Common damage every 3s. This is a melee attack.
Palace Sentry
Ranged attacker that can be Enraged into melee. All auto attacks deal Common damage; all ranged auto attacks have a range of 30m.
Take Aim: 4s interruptible induction, ranged (40m), standard targeting, deals Common damage to target.
Call Reinforcements: 5s interruptible induction. Summons a Palace Guard
Palace Guard
Melee attacker whose melee auto attacks deal Common damage.
Shield Slam: melee (3m), standard targeting, deals Common damage and interrupts inductions.
Shield Slam: melee (3m), targets a random player or pet that is inducting while in range, deals Common damage and interrupts inductions.
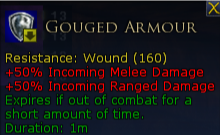
Gouge Armour: melee (3m), standard targeting, deals Common damage and applies Gouged Armour (curable, Wound) for 60s. Gouged Armour gives +50% incoming melee and ranged damage. This effect can stack.
Guard Captain
Melee attacker whose melee auto attacks deal Common damage.
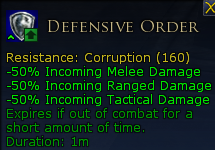
Defensive Order: Area of Effect (20m radius centered on caster), applies Defensive Order (Corruption) to all mobs within the radius, which grants -50% incoming all damage.
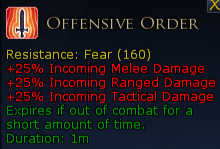
Offensive Order: Area of Effect (20m radius centered on caster), applies Offensive Order (curable, Fear) to all players within the radius, which gives +25% incoming damage.
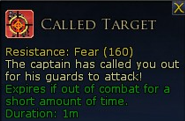
Call Target: melee (40m), targets random player that is not its threat target, deals no damage but applies Called Target (curable, Fear) to that player for 60s. Called Target causes the affected player to become the target for nearby enemies while afflicted.
Royal Guard
Melee attacker whose melee auto attacks deal Common damage.
Second Wind: Can only be cast by the Royal Guard while they are between 20-40% morale, applying Second Wind to the caster which heals 30600 morale initially and then 30600 morale every 3s for 60s.
Missing Tooltip
Vital Strike: melee (3m), targets a random player or pet that is not the aggro target, deals Common damage and applies Vital Strike to the target. Vital Strike deals Common damage initially, and Common damage every 3s until out of combat or until the affected player’s morale increases to full.
Missing Tooltip
Finish Them: melee (3m), targets a random player who’s health is below 20%, deals moderate Common damage, stuns the target for 5s, and applies Vital Strike to the target. Vital Strike deals Common damage initially, and Common damage every 3s until out of combat or until the affected player’s morale increases to full.
Missing Tooltip
Priestess of Command
Melee attacker whose melee auto attacks deal Common damage.
Mind Bend: tactical (40m), 10s interruptible channel, targets a random player within range. Deals Shadow damage initially and Shadow damage every 3s until channel ends.
Fear of the Eye: 4s interruptible induction, deals Shadow damage to all players within 20m and applies Induced Feared for 15s.
Missing Tooltip
Priest of Shadow
This enemy does not have any auto attacks.
Bolt of Darkness: tactical (40m), standard targeting, deals Shadow damage to target.
Summon Shadow: 5s interruptible induction. Summons Shadow Seeker
Utugi Impaler
Ranged attacker that can be Enraged into melee. All auto attacks deal Common damage; all ranged auto attacks have a range of 20m.
Impaling Throw: 8s non-interruptible induction, targets random player that is not the current threat target, deals moderate Common damage in a Line (2m wide by 30m long) to all players within the area. This is a ranged attack that can not be barred via an Enrage effect, and the damage is Distributed.
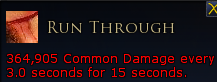
Run Through: 3s interruptible induction, targets a random player or pet within 20m, deals Common damage and applies Run Through for 15s. Run Through deals Common damage initially and then Common damage every 3s. This is a ranged attack.
Utugi Enforcer
Melee attacker whose melee auto attacks deal Common damage.
Grit Teeth: Can only be cast by the Utugi Enforcer while they are between 20-40% morale, applies Gritted Teeth to the caster. Gritted Teeth gives 75000 temporary moral and +30% melee damage and lasts until combat ends.
Missing Tooltip
Massive Slam: melee (5m), standard targeting, deals Common damage to all players within 5m and interrupts inductions. This is a melee attack.
Tharduth Statue
This object deals no damage and initially is unhostile to you.
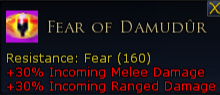
All it does is project an aura (~10m radius) that applies Fear of Damudur to all players within the radius. If hit by an effect the statue will ‘aggro’, but it does nothing additional. Defeating the statute will remove the aura.
Shadow Seeker
This enemy does not have any auto attacks. Creates a Clinging Shadows puddle at location on defeat.
Shadow Pulse: tactical (50m), deals Shadow damage to all players within 50m of caster.
Clinging Shadows: 4s non-interruptible induction, targets random player within range, deals Shadow damage and creates a Clinging Shadows hotspot at the target’s location that lasts for 300s. Clinging Shadow deals Shadow damage initially and then Shadow damage every 3s.
Missing Tooltip
Ratúlko the Bloody
Ratúlko the Bloody
Melee attacker whose auto attacks deal Common damage.
Smack: melee (5m), standard targeting but can only target pets, deals insanely high Common damage and applies Disregarded until combat ends. Disregarded multiplies the Perceived Threat of the afflicted pet by 0.
This skill is only usable on pets and is a means of not allowing a player pet tank the entity.
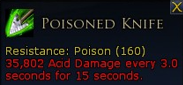
Poisoned Knives {“This new batch is particularly deadly!” or “A well-tested poison! Hahaha!”}: 2s non-interruptible induction, targets a random player, deals Acid damage and applies Poisoned Knife (curable, Poison) for 15s, which deals Acid damage initially and then Acid damage every 3s.
Jagged Blade {“Let me show you why they call me 'The Bloody!” or “I'll rip you open and bleed the secrets from you!”}: 0.5s non-interruptible induction, standard targeting, deals high Common damage and applies/tiers up Grisly Wound to all players within 5m of the target. This damage is Distributed.
Barbed Chain {“Come, come! Let us know each other better!” or “Get over here! Hahaha!”}: 10s non-interruptible channel, deals no initial damage but does apply/tier up Grisly Wound at the start. Then will periodically pull players towards the caster every 1s for 9s. Then at the end of the channel will create a Barbed Chain Finish hotspot (~5m radius centered on caster) that deals percentage (50%) Common damage.
The Barbed Chain Finish hotspot will linger for a few seconds and as such it is possible to move back into it and take the damage repeatedly if not careful.
Cauterize {“Don't die yet! I'm not done with you!” or “This stops the bleeding, but NOT the pain! Hahaha!”}: 5s non-interruptible induction, targets a random player, deals Fire damage to up to 6 players within the Area of Effect (Cone, 25°, 5m) and removes all tiers of Grisly Wound.
Strategy
This fight can be a bit awkward as it goes against typical fight norms in LOTRO due to the only frontal attack the boss has is Cauterize which everyone wants to get hit by. As such it is best to actually have everyone stack on the tank as tightly as possible so that every Cauterize cast is pointed at the whole group. This also will cause the entire fellowship to share the distributed damage from Jagged Blade, though it will cause everyone to gain stacks of Grisly Wound faster.
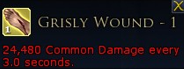
Speaking of Grisly Wound, this is the core mechanic of the fight that will need to be managed. Grisly Wound deals Common damage every 3s and the damage increases with each tier of the effect you obtain meaning that the higher tier you are the more damage you will be taking. If this ever tiers up to Tier 4 or higher the effect becomes curable (Wound) however at that tier the damage is quite severe so managing this effect so that it stays as low as possible will alleviate a lot of strain on your healers. If Grisly Wound ever reaches tier 11 the affected player is defeated.
The major mechanic to look out for is going to be the Barbed Chain since it's possible to run into that final hotspot multiple times if you aren't careful. I recommend tanking the boss next to either the Phial side or the non-Phial side so that the middle of the room is clear.
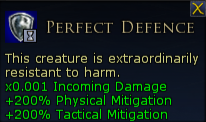
At 60% morale Ratúlko will rush over to the middle of the Phial wall, gain Perfect Defense, and cast Starting Experiment (3s non-interruptible induction). This will then trigger a lengthy channel where the boss is undamageable but a selection of the nearby Phials will be attackable. Each Phial will bestow a different effect and each effect lasts for 60s:
First Experiment
Blue Phial
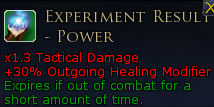
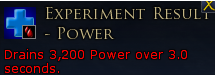
Bestows both Experiment Result - Power effects to all players within the arena and to Ratulko, which increases outgoing healing by +30% and multiplies tactical damage by x1.3 but it also drains power every 3s.
Red Phial
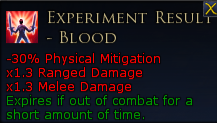
Bestows Experiment Result-Blood to all players within the arena as well as to Ratulko. This effect rescues physical mitigation by -30% but multiplies melee and ranged damage by x1.3. This will also apply/tier up Grisly Wound to all players.
Green Phial
Will spawn two Animated Oozes initially and then will periodically spawn two Animated Oozes every 20 seconds. This also removes Grisly Wound from all players
Animated Ooze
Melee attacker whose auto attacks deal Common damage.
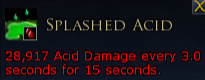
Acid Splash: tactical, targets a random player, deals Acid damage to all players within a Cone (45°, 7m) and applies Splashed Acid, which deals Acid damage initially and then Acid damage every 3s for 15s.
Chemical Reaction: 10s interruptible induction, deal very high Acid damage to all players within 50m of the caster and then destroys the caster. This skill can only be used when the caster is below 20% morale.
Once a Phial is destroyed Ratúlko will cease their channel, lose the Perfect Defense effect, and begin attacking again. If no Phial is destroyed then Ratúlko will gain Frenzied Experiment, which heals him for 612k initially and then heals for 612k every 3s for 30s.
Missing Tooltip
Upon reaching 30% morale, Ratúlko will rush over to the middle of the Phial wall, gain Perfect Defense, and cast Starting Experiment (3s non-interruptible induction) yet again, and as such a second Phial phase will begin in which you can damage any of the remaining Phials.
Fight ends upon reaching the boss reaching 1% morale.
On Tier 2 there are a number of changes which make the fight more complex.
After the initial cast of Poisoned Knives Ratúlko will cast a similar version of this skill, though lacking the induction, two more times. As such there will be three subsequent uses of Poisoned Knives (one with an induction and two without) that will need to be cleansed. Each of these can target the same target.
Barbed Chain Finish hotspot damage increased to percentage (75%) Common damage.
Cauterize induction is reduced by -2s (3s induction), and applies Seared Flesh to all players hit. Seared Flesh deals Fire damage initially and then Fire damage every 3s for 9s. In addition Cauterize can only hit up to 4 players at any time.
Missing Tooltip
Lock Up {“I think you all need some time in lock-up!” or “Send them to solitary confinement!”}: 5s non-interruptible induction. Deals no damage but will teleport all non-tank, healer, and defensive support players into the cells where you entered the arena from. Within each cell is a Bloody Torturer which once defeated will open the door to the cell.
45 seconds after the fight begins the boss will cast Lock Up which will teleport away the half of the group to the cells. To mitigate some of the damage done, the players who know they are going to get teleported should try and get hit by a Cauterize before they get sent to the cells. Tanks, Healers, and Defensive Supports can avoid Cauterizes during the pre-Lock Up part of the fight as they will have opportunities while the others are locked up. Each player will need to defeat the Bloody Torturer to open the cell door as well as pick up the Torturer’s Brand that is dropped from the Torturer. Picking this up will grant a new skill (XXXXXXX) which will cleanse the targeted player of their Grisly Wound and apply Seared Flesh. Once a player’s cell has been opened they are then able to use the levels within the hallway to open other player’s cells and assist them with their torturers. Once all four torturers are defeated the gate back to the arena will open, but be sure to bring the Torturer’s Brand even if you do not have any Grisly Wound stacks as its better to have a brand on hand to purge someone if they miss a Cauterize.
During this time the healer should try and stand as close to the gate to the cells as they can as some area of effect healing skills will still reach the Locked Up players. At the same time the tank should move the boss to the opposite side of the arena (exit side) for two reasons:
Barbed Chain would be out of range to the players that are Locked Up and such not tier up their Grisly Wound.
No risk of a Barbed Chain Finish hotspot from being in a location where everyone would then need to run through. Once all players have escaped, the group should stack back up and continue.
The tank may take a large burst of damage during this time if they get hit by Jagged Blade, as there wouldn’t be anyone else there to distribute the damage. The Defensive support should stay out of range (5m) if Jagged Blade is coming up as they likely wouldn’t be able to survive splitting the damage with just the tank.
If your group has high enough damage you can push the boss straight into the Phial phases without even having to interact with the Lock Up mechanic. This makes the fight significantly easier but does require a high level of damage.
During the second Phial phase two additional Phial options become attackable:
Second Experiment
Yellow Phial
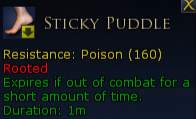
Creates 3 Sticky Puddle hotspots (~5m radius) randomly throughout the arena, which applies Sticky Puddle (curable, Poison), rooting them in place until cured. Classes with Inductions can use these puddles to root themselves in place during Barbed Chain, ignoring the forced movement.
Purple Phial
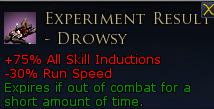
Bestows Experiment Result-Drowsy to all players within the arena as well as to Ratúlko. This increases skill inductions by +75% and reduces movement speed by -30% but heals 30,600 morale every 3s.
Missing Tooltip
A viable strategy is to ignore the phials during the first experiment and simply damage through the healing Ratúlko gains. Then for the second experiment pick the Yellow phial as it is the least intrusive. This makes the fight much easier.
On Tier 3 there are a few additional mechanics.
Cauterize induction reduced by -2s, and applies Seared Flesh to all players hit. Seared Flesh deals Fire damage initially and then Fire damage every 3s for 9s. In addition Cauterize can only hit up to 2 players at any time. Lastly when removing any tiers of Grisly Wound any player hit gains a tier of Seared Scars equal to the number of tiers of Grisly Wound that were removed. Seared Scars lasts for 60s and each tier of the effect multiplies incoming damage by x1.2 (stacking up to 5 times, max x2 incoming damage).
Missing Tooltip
Chain Lash {“Hahaha! Better keep moving!” or “Hahaha! Watch them dance!”}: 1s non-interruptible induction, deals Fire damage in a large hotspot (~10m radius). This attack is part of a four-attack sequence where it is chain cast repeatedly. The first hotspot is always in the south west quadrant of the arena (by the green phial) and each cast will move the hotspot to the next quadrant going counter-clockwise. With the third cast there will be an additional hotspot in the entrance gate, and the fourth cast will have an additional hotspot in the exit gate. These additional hotspots are to stop players from standing in the same location to avoid the mechanic entirely.
While these attacks are part of a sequence, they are in fact not set up as a ‘chain’ of skills and such it is possible for Ratúlko to use a different skill in between the castings of Chain Lash. If this happens be aware that the remaining Chain Lash attacks will be used once the higher priority skills are used. This can also include when the boss phases to mix a potion, in which the Chain Lashes will still be cast and still need to be dodged even though the boss is channeling his experiment.
The overall strategy doesn't change too much as the core mechanics are the same; however, with each Cauterize only hitting two players per cast it should be designated who should be moving into the area of effect and who should be moving out so that no one ends up having too many stacks of Grisly Wound. Ideally with coordination you’ll be able to keep everyone around 2-3 stacks. Tank and Healer should avoid getting hit with Cauterize when the rest of the group is with them in the main arena as they are able to use Cauterize while the rest of the group is in Lock Up. In addition, if managed correctly it should be possible to have at least two of the players who get teleported for Lock Up do so without any Grisly Wound stacks. This means that they are able to pick up the Torturer’s Brands like normal and hold on to them as a back up if anyone misses a Cauterize cleans.
Chain Lash is a predictable mechanic that, while likely a one-shot if not moved out of it does always start in the same quadrant and move in the same direction. Just don’t tank the boss in that quadrant nearest to the Green Phial and move into that quadrant after the first Chain Lash goes off. Players who are escaping Lock Up should be aware that the area near the entrance gate also gets hit with a Chain Lash, and as such should wait to reenter until that mechanic completely finishes.
During the second Phial phase an additional Phial options become attackable:
Second Experiment
Missing Tooltip
Orange Phial
Deals 45,900 Common damage every 3s, reduces incoming healing by -50%, reduces all inductions by -75%, and multiplies all damage by x1.2.
Dark Priestess Barkhuráni
Dark Priestess Barkhuráni
Melee attacker whose auto attacks deal Common damage.
Smack: melee (5m), standard targeting but can only target pets, deals insanely high Common damage and applies Disregarded until combat ends. Disregarded multiplies the Perceived Threat of the afflicted pet by 0.
This skill is only usable on pets and is a means of not allowing a player pet tank the entity.
Gaze of the Eye {“Tremble before the gaze of The Eye!”, or “The Great Eye gazes upon you!”}: 2s non-interruptible induction, deals Shadow damage to all players within 50m of the caster and applies/tiers up Domination. This is a tactical attack.
Bend Will {“You will bend to MY will!” or “Hear me and SERVE!”}: 10s interruptible channel, targets a random player, deals percentage (15%) Shadow damage initially and applies/tiers up Domination, and then deals percentage (15%) Shadow damage and applies/tiers up Domination every 3s.
Call Shadows {“Come, shadows! Obey me!” or “Shadows! Drown these interlopers!”): 3s non-interruptible induction, targets a random player within 100m of the caster, deals high shadow damage to the player and summons a Shadow Seeker within 1m of the targeted player for 300s. This is a tactical attack.
Vision of Demise {“Witness your own end!” or “Your death comes!”}: tactical (100m), targets a random player who has at least 2 stacks of Domination, this attack deals no damage but applies Grasping Shadows which roots the player in place. This will then be immediately followed up with Vision of Demise (Distributed). This attack also puts a Red Eye over the head of the target.
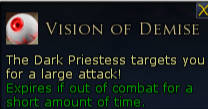
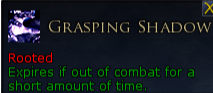
Vision of Demise (distributed): 4s non-interruptible induction, targets player with Grasping Shadows, deals high Shadow damage to all players within 5m of the targeted player. This damage is Distributed and will remove the root from the targeted player.
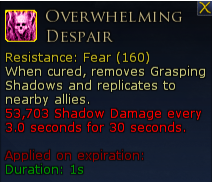
Overwhelming Despair {“Your sorrow fuels my power!” or “You cannot win! There is no hope!”}: tactical (100m), targets a random player other than the aggro target with at least 4 Domination, deals Shadow damage to the target and applies Overwhelming Despair (curable, Fear) for 30s, which deals Shadow damage every 3s. On removal or expiration Overwhelming Despair will deal percentage (30%) Shadow damage and applies Overwhelming Despair to all players within 5m of the player that had the effect that was removed. Removing Overwhelming Despair will also cleanse any Grasping Shadows within the 5m.
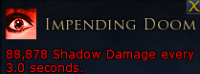
Impending Doom {“Your worst fear is made manifest!” or “Doom comes for you!”}: tactical (100m), targets a random player who has at least 7 Domination stacks, deals Shadow damage to the target and applies Grasping Shadows and Impending Doom. Impending Doom deals Shadow damage every 3s. Grasping Shadows and Impending Doom are only removed upon defeating the Vision of Doom that spawns along any of the walls of the arena.
Destroy Mind {“It is over! You are mine! Hahaha!” or “You belong to me now! Hahaha!”}: 3s non-interruptible induction, targets a random player who has 10 Domination Stacks, deals high Shadow damage to the target and removes Domination stacks.
Strike from Shadows: tactical (5m), targets a random player, deals Shadow damage. This skill can only be used while the boss is Stealthed.
Strategy
This fight can be a bit confusing as many of the mechanics are tied directly to the Domination mechanic. In effect each player will be gaining stacks of Domination and based on how many stacks they have will determine what mechanics the boss can use on that player. Domination stacks up to 10 stacks, at which you are rooted and unable to use skills for 60s.
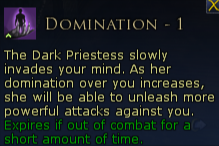
Domination stacks can be gained from multiple skills. Gaze of the Eye will give all players 1 stack of Domination, while whoever is the target of Bend Will will gain 1 stack initially and then 1 stack every 3s the channel is allowed to persist. This serves as a pseudo-soft enrage timer as the higher your stacks go the more abilities the boss can use on your, and when you reach maximum stacks you will be unable to move or use skills.
Periodically everyone except one player will the knocked away, and that player will have a Red Eye over their head. This indicated that they are targeted for the Vision of Demise distributed hit and as such everyone should rush back and stack with the player being rooted.
The only methods of removing Grasping Shadow is to be hit by other mechanics; specifically Vision of Demise or curing the Overwhelming Despair effect. Thus staying grouped as tightly as possible so that everyone is sure to get hit by the mechanics that they need is very important. As the boss has no frontal attacks, stacking on the tank is perfectly safe and encouraged.
When Barkhuráni Calls Shadows, damage dealers should focus those down while Defensive Supports should be prepared to interrupt the Shadow Seeker’s Clinging Shadows inductions with some form of hard crowd control (stun, daze, fear). As the shadows are spawned at a player’s location, they should then be spawned on top of the group where they can easily be dealt with. Once the Shadow Seekers are defeated, move as a group out of the Clinging Shadows puddle they leave.
If anyone reaches 4 Domination they will get targeted with Overwhelming Despair. This will root them in place with Grasping Shadows and give them the curable Fear effect Overwhelming Despair. Even though it is a curable effect, resist the urge to cure it right away, and instead everyone group on the affected/rooted player to ensure that the next Vision of Demise will be at their location, and then once the Vision of Demise removes the Grasping Shadow root, the affected player needs to run away from the group to cure the effect. If cured while too close to another player then the effect will spread to nearby players.
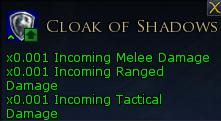
When Barkhuráni reaches 50% she will cast Engulfing Darkness (6s non-interruptible induction), which will plunge the arena into darkness and cause Barkhuráni to be stealthed, gain Cloak of Shadows and Shadow Mend, as well as all players will be affected by Engulfing Darkness.
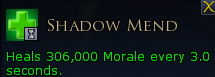
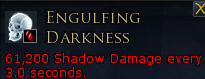
This starts the Curtain Phase, and as such groups of Shadow Terrors will begin spawning in the corners of the room. Additionally there will be four Curtain Cords in the corners as well. Selecting the Curtain Cord will begin a lengthy (20-30s) induction after which the cord will disappear. Barkhuráni will attack randomly with Strike from Shadows during this phase. Once all four cords are pulled the Curtain Phase will end.
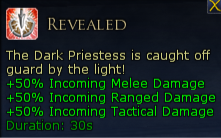
Ending the Curtain Phase will cause Barkhuráni to scream, lose her buffs, and gain Revealed for 30s. This is a major damage window.
Shadow Terror
Melee attacker whose auto attacks deal Common damage
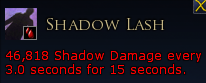
Shadow Lash: tactical (3m), standard targeting, deals shadow damage to the target and applies Shadow Lash for 15s, dealing Shadow damage every 3s.
Grip of Fear: 3s interruptible induction, deals Shadow damage to all players within 50m of the caster. This is a tactical attack.
At some point at this time she will use Call Shadows again, and like before the Defensive Support needs to be ready to interrupt the inductions to minimize the number of Clinging Shadows puddles.
At this point the fight is just like the beginning, only there is a good chance that people will be getting higher in Domination stacks. If anyone reaches 7 Domination they will be subjected with Impending Doom. Like other skills this will root the affected player with with Grasping Shadow but will also apply the Impending Doom damage over time to the player, as well as spawn a Vision of Doom somewhere along the arena’s walls. This Vision, which is a ghostly visage of Sauron, will walk slowly towards the player with Impending Doom. If the Vision of Doom reaches the targeted player they will take a lot of percentage damage and the Vision will vanish, however you can remove the Grasping Shadow and unroot the affected player. After which they can move around as needed to void the Vision of Doom.
On Tier 2 there is one additional mechanic and changes to Curtain Phase.
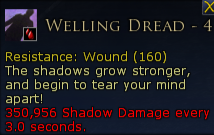
Welling Dread: tactical (7m), standard targeting, deals Shadow damage to target, applies/tiers up Domination, and applies/tiers up Welling Dread (curable, Wound). Welling Dread deals Shadow damage initially and then Shadow damage every 3s until removed. The damage over time effect increases in magnitude as Welling Dread increases in tier.
On removal Welling Dread will cause a large blast, dealing massive Shadow damage to all players within 30m of the player who removed the effect (Welling Dread Burst). The damage of Welling Dread Burst scales down as the tier of Welling Dread increases, and at Welling Dread - 4 and higher there is no blast.
Missing Tooltip
Shadow Guardian
This creature does not move, has melee auto attacks (3m) that deal Shadow damage.
Bolt of Darkness: tactical (40m), targets a random player within range, deals Shadow damage to target.
On Tier 3 the fight becomes even more complex with additional mechanics and altered existing ones.
Overwhelming Despair creates a Clinging Shadows hotspot on removal or expiration. Clinging Shadows hotspot lasts for 300s.
Destroy Mind no longer deals damage, but instantly defeats the target.
After 10s from the fight starting the first Haunting Spectre will spawn along one of the walls of the arena. This enemy has multiple randomly targeting attacks, but all of them must target a random healer, which is likely to be only one player. As such the Haunting Spectre is going to focus down the healer and its main attack will create Clinging Shadow puddles. As such they need to be defeated as soon as possible; target priority during Phase 1 is Haunting Spectre > Seeking Shadows > Barkhuráni.
45s after the first Haunting Spectre spawns the second will spawn.
45s after the second Haunting Spectre spawns the third will spawn. It is possible a fourth will spawn 45s after the third. Unknown at this time.
This puts a very high damage check on the fight as you have to get to the Curtain Phase before the tank reaches Domination 10, all the while having to focus damage to things other than the boss. Start the fight by pulling the boss to the corner of the inner ‘grey square’ on the floor. The idea is to keep all of the Clinging Shadow hotspots in the center of the arena to give space to move around during the Curtain Phase, and when running out of the group to cure Overwhelming Despair try and press up against the wall to conserve as much space as possible.
There are no changes to Curtain Phase, but given the tier of the instance everything will be dealing higher damage. It is even more important to stay grouped and clear as many of the Shadow Terrors as fast as possible while the Curtain Cord is being pulled. Keeping one or more of the Shadow Guardians crowd controlled will help as well.
Phase 2 is just like Phase 1, and includes another sequence of Haunting Spectres to contend with. At this point you’ll want to maneuver around the outside of the arena as the puddles will likely still be in the middle. Target priority switches back to Haunting Spectre > Seeking Shadows > Barkhuráni.
Vision of Doom
Melee attacker who has no auto attacks. only moves slowly towards the target with Impending Doom
Doom: tactical (3m), targets whoever has Impending Doom, deals percentage (75%) Shadow damage and applies/tiers up Domination, and applies Shadow Lash for 15s, deals shadow damage initially and Shadow damage every 3s. After which the Vision of Doom is destroyed.
Haunting Spectre
Melee attacker whose auto attacks deal Shadow damage.
Bolt of Darkness: tactical (100m), targets a random healer, deals Shadow damage.
Mark of Haunting: tactical (100m), targets a random healer, deals Shadow damage and applies Haunting Mark, which lasts until combat ends and reduces run speed by x0.8.
Missing Tooltip
During the Curtain phase each corner will now have a Shadow Guardian that must be defeated before the Curtain Cord can be used.
Welling Dread adds another effect that you do not want to cure as doing so will instantly wipe everyone but the tank. This also causes the tank to build stacks of Domination much faster than everyone else, which puts a damage check on the fight as you ideally want to reach the Curtain Phase before the tank reaches Domination 7. If anyone is rooted by Grasping Shadows going into the Curtain Phase, let them die and get revived as it will be a few minutes before another Vision of Demise will be cast.
The added Shadow Guardians means that the Curtain Phase now has a lot more damage going out to the entire fellowship at random and as such staying grouped up as much as you can will help the healer. At Phase start the Defensive Support should throw a Daze or Fear on one or two of the Shadow Guardians to reduce the damage some.
In addition at the start of the phase, if the tank has any stacks of Welling Dread less than 4, they should run away from the group to the opposite corner and cure the effect. This should put them far enough out of range to not hit anyone else and will remove the constant damage to the tank.
Once the Shadow Guardian is defeated have the Defensive Support start pulling the Curtain Cord while the damage dealers focus on clearing out as many of the Shadow Terrors as they can. While the Shadow Terrors are not a big threat individually, they spawn in waves of 3-6 and each of their Grip of Fear inductions will hit the entire room regardless of where they are positioned, so better to just keep the group together and clear out as many of the terrors and then move to the next corner.
Once all four Guardians are defeated and cords pulled Phase 2 will start the same as before. This is still a mirror of phase 1 where you are racing against the Dominations stacks.
Shadow Claw: tactical (3m), targets a random healer, deals Shadow damage and creates a Clinging Shadows hotspot at the target’s location. Clinging Shadows hotspot lasts for 300s.
Missing Tooltip
Góramul Sai
Thothril the Entangler
Góramul Sai
Melee attacker whose auto attacks deal Common damage
Smack: melee (5m), standard targeting but can only target pets, deals insanely high Common damage and applies Disregarded until combat ends. Disregarded multiplies the Perceived Threat of the afflicted pet by 0.
This skill is only usable on pets and is a means of not allowing a player pet tank the entity.
Corrupted Strike {“Strike of the Black Serpent!” or “Succumb to my new power!”}: 4s non-interruptible induction, targets a random player, deals Acid damage to all players within a Cone (45°,7m) and applies Corrupted Venom (curable, Poison) for 15s. This is a tactical attack. Corrupted Venom deals Acid damage initially and Acid damage every 3s, and on removal will deal percentage (40%) Acid damage (Corrupted Venom Burst) and apply/tier up Madness to up to 6 players within 5m
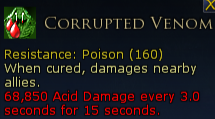
Spear of Corruption {“The world will drown in the Serpent's venom!” or “My venom will consume you all!”}: 3s non-interruptible induction, randomly targets an invisible monster in one of the four quadrants of the arena. After which will create an area in which all players are periodically pulled towards the Spear. After a few seconds the pulling will stop and a hotspot (~5m radius) is created on the spear dealing Shadow damage to all players within and applying/tiering up Madness (called Corrupted Spear Burst).
Strategy
Phase 1 of this fight consists of fighting against Góramul Sai and considering he only has two skills it should be a rather uneventful fight.
Avoid the Corrupted Strike frontal attack by either side stepping or running through. Trying to out range it may still have you getting hit as the the range seems a bit longer than the area of effect indicator tells you. if you do get hit by Corrupted Strike, move away from the group and cure the Corrupted Venom effect to avoid damaging the rest of the fellowship.
When Góramul Sai casts Spear of Corruption, look to where the spear is being targeted towards and run away from it. Ideally you stay out of the massive area of effect as the constant pull towards the middle is a bit annoying, but if you do manage to get caught by it as long as you aren’t in the middle when the pulling stops then you will avoid the mechanic all together.
After 60s into the fight two Animated Armours will spawn from one of the walls and join the fight. Tank should pick these up and try and interrupt the Clattering Armour induction to minimize the Madness stacks. Defeating an Animated Armour will create a Shard of Reality on the ground for someone to pick up.
At 80s into the fight two Images of Thothril will spawn (eastern and western walls). These do not but will chain cast Bolt of Madness at random until they are destroyed. You can destroy both at the same time by fighting the Image with glowing purple eyes.
If this phase continues for longer more Animated Armours will join in. the second wave will have three. It doesnt matter too much who picks up the Shards of Reality on this tier but a good practice is the first two should go to the tank and healer, then the damage dealers, then the supports.
This phase ends when Góramul Sai is defeated.
Thothril the Entangler
This creature does not move, has melee auto attacks that deal Shadow damage in Cone ( 45°, 7m).
Smack: melee (5m), standard targeting but can only target pets, deals insanely high Common damage and applies Disregarded until combat ends. Disregarded multiplies the Perceived Threat of the afflicted pet by 0.
This skill is only usable on pets and is a means of not allowing a player pet tank the entity.
Bolt of Madness: tactical (40m), standard targeting but only if the aggro target is greater than 6.5m but less than 100m from the caster. deals Shadow damage to the target.
Force of Madness: 4s non-interruptible induction, targets a random player, deals Shadow damage to all players in a Line (5m wide by 50m) and applies/tiers up Madness every second for 2s (2 Madness total).
Take not that this skill is not positioned correctly and as such it is possible to get hit by this even if you are on the opposite side of where the Line is pointing. You do not was to stand directly behind Thothril, but rather of to an angle to avoid this possibility.
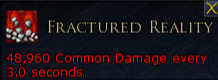
Fractured Reality {“I will sunder your reality!” or “Reality comes crashing down!”}: creates Fractured Reality hotspots (~5m radius) which deals Common damage every 3s.
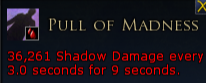
Pull of Madness {“Come closer, little puppets!” or “Come to me, and earn your reward!”}: 6s non-interruptible channel, During this channel each player is periodically dragged towards the caster and at the end of the channel this skill creates three hotspots all centered on the caster.
The largest of the hotspots has a radius such that it encompasses the entire room (Pull of Madness - Far), deals Shadow damage, and applies/tiers up Madness.
The middle hotspot has a radius of ~10m (Pull of Madness - Medium), deals Shadow damage, and applies/tiers up Madness.
The smallest hotspot only has a radius of ~5m ((Pull of Madness - Close), deals Shadow damage, and applies/tiers up Madness.
In addition this will apply Pull of Madness for 9s, which deals Shadow damage every 3s.
This means that this is an unavoidable method of building Madness, but at the same time it's possible to gain multiple tiers of Madness quickly if you are hit by multiple of the hotspots at the same time.
Animated Armour
Melee attacker whose auto attacks deal common damage.
Armoured Slam: melee (3m), standard targeting, deals Common damage and stuns the target for 2s.
Clattering Armour: 3s interruptible induction, deals Shadow damage to all players within 50m of the caster and applies/tiers up Madness. This is a tactical attack.
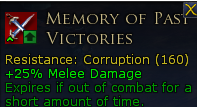
Memory of Past Victories: applies Memory of Past Victories (Corruption) to caster. This corruption increases outgoing damage by +25%.
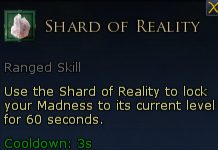
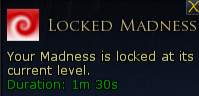
In order to avoid building up to the severely detrimental Madness 7, a player will need to pick up and use a Shard of Reality. Using a Shard of Reality will grant the buff Locked Madness for 90s (ignore the “60s on the tooltip for Shard of Reality) and during that time nothing will increase your Madness regardless of getting hit by effects. These can be obtained from defeating the Animated Armours in Phase 1 and thus they are rather rare. The only other means to avoiding building too high is to finish the fight as fast as you can.
Image of Thothril
This creature does not move, nor does it have any auto attacks.
Bolt of Madness: tactical (40m), targets a random player within range. deals Shadow damage to the target.
What is Madness?
Many of the bosses abilities will apply/tier up Madness or the player. Once you have a stack there is no way to remove it, and managing how many stacks you have it key to understanding this fight. There are 7 stacks total, with some granting beneficial effects and some detrimental.
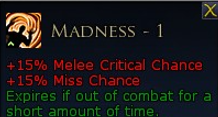
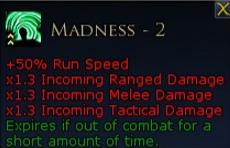
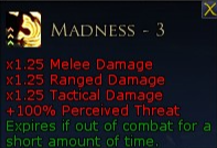
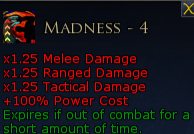
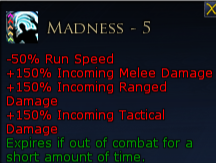
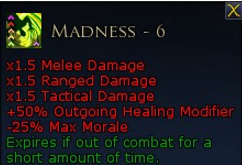
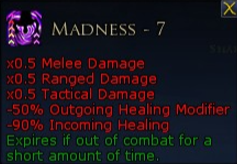
These can be obtained from defeating the Animated Armours in Phase 1 and thus they are rather rare. The only other means to avoiding building too high is to finish the fight as fast as you can.
Phase 2 begins with the massive spectral visage of Thothril arising in the middle of the arena. Tanks should be aware that all of Thothril’s auto attacks are massive cones frontals and as such they should stand opposite of the group and facing the boss away.
Overall this phase is very simple as aside from getting hit by the frontal auto attacks the rest of the group doesn’t take a lot of damage if players are playing to the mechanics.
What is not mentioned anywhere is that from the time that the fight starts until the fight ends there is a 40s clock repeating. This clock will constantly count down and then apply 1 Madness to everyone without hitting them with any mechanics.
Pull of Madness offers an opportunity to quickly gain Madness if the player is capable of surviving the multiple instances. This combined with the forced Madness can allow a player to quickly reach a strong beneficial tier and then lock in that tier with a Shard of Reality. The cost of being too greedy however is that Madness 7 is the worst possible result and the only way to reset Madness is to be defeated.
Once Thothril is defeated the fight ends.
On Tier 2 there are no additional mechanics but there are a few changes with actually make the fight easier.
Corrupted Strike induction reduced by -2s (now 2s)
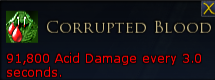
Corrupted Venom Burst will also create a Corrupted Blood hotspot (~5m radius) at the location of the player who had the effect. This hotspot lasts for 300s, deals Acid damage initially, and Acid damage every 3s. Corrupted Blood hotspots also heal enemies for 367,200 morale initially, and 367,200 morale every 3s while within the hotspot.
Missing Tooltip
the weapon stands that are spaced out around the room will periodically animate and after a few seconds will fly across in a Line Attack (~2m wide by the width of the arena long) This attack deals Common damage and knocks back any player hit.
Note that the width of this attack is larger than the indicator line, so give this attack a wider berth than you may think and you’ll avoid the effect.
Walking into a Fractured Reality hotspot will create a Shard of Reality.
Phase 1 progresses with little changes beyond dodging the Weapon Stand attacks and the faster casting of Corrupted Strike. If a player is hit by Corrupted Strike then they should run to a wall away from everyone else before curing so tha tthe Corrupted Blood puddle arent in the way. The corners of the arena are great options for this as that leaves the middle of the wall clear in case that is the Image with the purple eyes.
The first major change happens when the Images of Thothril spawn as there are now four of them, one per wall. Defeating the one with the glowing purple eyes will still instantly destroy all of the remaining Images.
The only other major change happens in Phase 2 as you can now create as many Shards of Reality as you could want. This allows a much more controlled management of one’s own Madness.
On Tier 3 the fight becomes even more chaotic and a very steep damage check gets added.
Every 3s after Goramul Sai uses Spear of Corruption, the spear will use Corrupted Spear Throw at a random player. This is a Line (1m wide by 50m long), deals Common damage, and knocks players away.
Corrupted Venom Burst percentage damage increased to 50% and the radius of the burst increased to 50m. In addition, when cured applies Corrupted Blood to up to two other players within 5m of the player who had the effect cured.
Pull of Madness - Far (the largest, room wide hotspot component of the Pull of Madness skill) no longer deals damage, but instead applies Corrupted Venom. When curing this Corrupted Venom the burst of damage is now called Pull of Madness - Far.
In Phase 1, if anyone gets hit with Corrupted Strike they need to cure the poison ONLY against the western wall, starting in the corners to keep the middle clear in case of that Image having purple eyes. Healers need to be prepared when anyone is curing Corrupted Venom with either mitigations or prepared to quickly heal everyone back up after the burst of damage. If multiple people cure theirs at the same time will will cause a wipe.
Phase 2 is where the fight takes a bit turn and becomes a very tight damage check. Most of the mechanics remain working as they do in T2, however Pull of Madness creates a soft enrage effect in addition to applying the improved Corrupted Venom.
After the first Pull of Madness the entire western wall will be consumed by Corrupted Blood puddles.
The second Pull of Madness will cover the eastern wall with these same puddles.
The third Pull of Madness covers the northern and southern walls, and as such reduces the active arena to the size of the center square.
The fourth Pull of Madness covers the western half of the central square.
The fifth Pull of Madness covers the eastern half of the central square, completely covering the room.
This is assumed. Never seen the fight last this long.
This combined with the Corrupted Venom damage bursts and puddles causes this fight to hit a soft enrage after the third Pull of Madness and likely combat will end before the fourth Pull of Madness.
In all, this fight is a damage and healing check. When Pull of Madness starts non-tanks should position themselves on the eastern side of the room and stay close so that everyone is within healing range. Then one by one have a person move to the south eastern corner to pot their Corrupted Venom, positioning themselves so that the Corrupted Blood puddles overlap as much as possible. This should preserve some of the northern wall for use with the second Pull of Madness. If positioning is a concern along the northern wall, have one or two people position at the southern wall to drop puddles there but note that these players will be away from the healer and might be at greater risk.
Once the third Pull of Madness happens there isn't going to be much room to position and drop the Corrupted Blood puddles left and as such this acts as the soft enrage mechanic