The Folly of Nagakhêdi
Non-Boss Enemies
For over a hundred years, the Kintai Elves have battled a mysterious blight, seemingly brought on by the Din of Stone. It has already consumed once-beautiful Adagím, and now threatens the rest of the Elven glades. An investigation by the Rangers Faeron and Rhadrog have tracked the source of the blight to the The Folly of Nagakhêdi, but what dangers lurk inside the ancient and abandoned wonder?
Non-Boss Enemies
Spider Wing
This includes the enemy list encountered from the start of the raid up to the first boss Badharál the Gorger
Badharál’s Webmother
Melee attacker.
Hunter’s Kiss: melee (3.5m), standard targeting, deals Common damage
This serves as this creature’s auto attack
Silken Mend: targets all random monsters within 10m of the caster, applies Silken Mend (curable, Disease) for 10s, which heals for 61200 initially and then 61200 every 1s.
Even though this is listed as a curable effect, it is applied to the monsters and as such you can't remove it. You’ll just have to damage through this.
Missing Tooltip
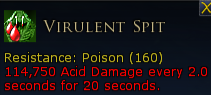
Virulent Spit: 3s interruptible induction, targets a random player or pet that is more than 10m but within 60m of the caster, deals no damage but applies Virulent Spit (curable, Poison) for 20s. Virulent Spit deals Acid damage initially, and then Acid damage every 2s. This is a ranged attack.
Shake the Web: 2s interruptible induction, summons a Webmother’s Brood 5m behind the caster for 300s
Webmother’s Brood
Melee attacker.
Carapace Bash: melee (3.5m), standard targeting, deals Common damage.
This serves as the creature's auto attack.
Savage Blows: 3s interruptible induction, targets a random player within melee range, deals Common damage to all players in a Cone (120°, 6m). This is a melee attack.
Flurry of Barbs: melee (6m), standard targeting, deals Common damage to all players in a Cone (120°, 6m).
Badharál’s Skulker
Melee attacker.
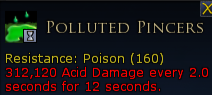
Polluted Pincers: melee (3.5m), standard targeting, deals Common damage.
This serves as the creature's auto attack.
Calculated Pounce: 3s interruptible induction, targets a random player or pet within 20m of the caster, deals Common damage. This is a melee attack.
Onslaught of Barbs: melee, targets a random player, deals Common damage to all players in a Cone (120°, 6m).
Badharál’s Spitter
Acid Spit: ranged (40m), standard targeting, deals Acid damage.
This serves as the creature’s auto attack; however, this skill is not barred from use by any Enrage effect.
Entangling Web: melee (35m), standard targeting, deals no damage but applies Snaring Webs to the target for 8s. Snaring Webs roots the affected player for the duration.

Virulent Spit: 3s interruptible induction, targets a random player or pet that is more than 10m but within 60m of the caster, deals no damage but applies Virulent Spit (curable, Poison) for 20s. Virulent Spit deals Acid damage initially, and then Acid damage every 2s. This is a ranged attack.
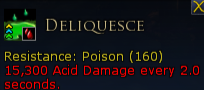
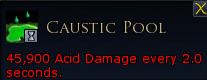
Caustic Pool: ranged (3.5m), targets a random player that is more than 10m but within 60m of the caster, deals no damage but creates a Deliquesce hotspot (~2.5m radius) at the target's location. Deliquesce hotspot deals Acid damage initially and then Acid damage every 2s.
This skill can only target a player within melee range, and such the Spitter will move themselves into melee range in order to use this skill. No need to enrage these mobs.
Badharál’s Weaver
Melee attacker.
Sweep of Legs: melee (3.5m), standard targeting, deals Common damage.
This serves as the creature's auto attack.
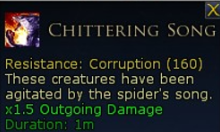
Chittering Song: targets all random monsters within 10m of the caster, applies Chittering Song (Corruption) for 60s. Chittering Song multiplies all damage by x1.5.
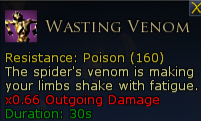
Wasting Venom: deals Common damage to all players within 10m of the caster and applies Wasting Venom (curable, Poison) for 30s. Wasting Venom multiplies all damage by x0.66.
Badharál’s Hunter
Melee attacker.
Hunter’s Kiss: melee (3.5m), standard targeting, deals Common damage.
This serves as the creature's auto attack.
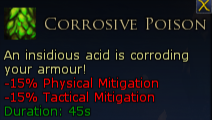
Caustic Fluid: melee (3.5m), standard targeting, deals Acid damage and applies Corrosive Poison for 45s, which reduces mitigations by -15%
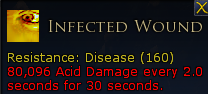
Infected Wound: melee (3.5m), targets a random player within melee range, deals no damage but applies Infected Wound for 30s. Infected Wound deals Acid damage initially and then Acid damage every 2s.
Troll Wing
Morvul Darkwing
Melee attacker whose melee auto attacks deal Common damage.
Flying Charge: 3s non-interruptible induction, targets a random player within 100m, deals no damage directly but applies Charge Target to the target for 5s. The caster gains Flying Charge for 5s which increases runspeed by x2 and gains Darkwing Talons. Darkwing Talons grants an aura (3m radius) to the caster which will cause it to knock back any players within the aura every 1s, as well as deal Common damage to any players within the aura initially and then deal Common damage every 3s.

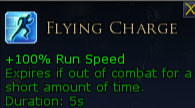
Charge Slash: melee (3m), targets a random player, deals Common damage. This attack is a part of a sequence and will be used immediately after Flying Charge finishes.
Claw Slash: 2s non-interruptible induction, targets a random player, deals acid damage. This is a tactical attack.
Troll Crusher
Melee attacker whose melee auto attacks deal Common damage.
Upheaval: ranged (40m), targets a random player other than the current aggro target, deals no damage but applies Upheaval to the target for 8s. On expiration, Upheaval creates a hotspot (~2.5m radius) for 1s which deals Common damage to all players within.
This places a Green Eye over the head of the targeted player.
Stomp: has no target, but instead deals Common damage to all players within 40m of the caster. This is a melee attack.
Troll Demolisher
Melee attacker whose melee auto attacks deal Common damage.
Ground Slam: 3s non-interruptible induction, deals Common damage to all players within 20m of the caster as well as stuns affected players for 2s. This is a melee attack
Troll Demolishers in the Troll Wing are immune to crowd control effects thus will need a Fellowship Maneuver to interrupt this cast.
Brutal Swing: standard targeting, deals Common damage to all players a Cone (90°, 5m) and knocks player backwards. This is a melee attack.
Fungal Troll Demolisher
Melee attacker whose melee auto attacks deal Common damage.
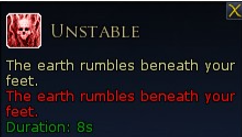
Tremor: melee (120m), standard targeting, deals no damage but applies Unstable to the target for 8s.
Avalanche 0.5s non-interruptible induction, targets Unstable player, deals Common damage in a Line (3m wide by 40m long).This is a melee attack.
Blighted Bloom: ranged (40m), targets a random player or pet other than the aggro target, deals no damage but applies Blighted Bloom for 5s. On expiration, Blighted Bloom creates a Blighted Bloom mushroom at the player’s location.
Blighted Bloom
This is an object that does not move. Only casts Blighted Bloom and then despawns.
Blighted Bloom: 10s non-interruptible induction, deals Common damage to all players within 40m of the caster and destroys the Blighted Bloom mushroom.
Seregost Black Uruk
Melee attacker whose melee auto attacks deal Common damage.
Interrupting Shout: 2s non-interruptible induction, deals Common damage to all players within 50m of the caster, and interrupts inductions. This is a melee attack.
Axe Throw: 2s non-interruptible induction, targets a random player, deals Acid damage. This is a tactical attack.
Catching Up with the Legion
Morvul Darkwing
Melee attacker whose melee auto attacks deal Common damage. This creature only has auto attacks.
Morroval Blade-thrower
ranged attacker
Knife Throw: ranged (5-40m), standard targeting, deals Common damage
This serves as this creature’s auto attack
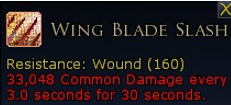
Wing Blades: 3s non-interruptible induction, deals Common damage to all players within 7m of the caster, and applies Wing Blade Slash (curable, Wound) for 30s. Wing Blade Slash deals Common damage initially and then Common damage every 3s.
Morroval Bloodsinger
Melee attacker whose melee auto attacks deal Common damage.
Bleed for Me: 5s non-interruptible induction, targets a random player within 40m, deals percentage (25%) Common damage and applies Flowing Blood. Flowing Blood deals Common damage initially and then Common damage every 3s until the affected player is healed to full, which removes the effect.
Missing Tooltip
Seregost Black Uruk
Melee attacker whose melee auto attacks deal Common damage.
Interrupting Shout: 2s interruptible induction, deals Common damage to all players within 50m of the caster, and interrupts inductions. This is a melee attack.
Axe Throw: 2s non-interruptible induction, targets a random player, deals Acid damage. This is a tactical attack.
Troll Demolisher
Melee attacker whose melee auto attacks deal Common damage.
Ground Slam: 3s non-interruptible induction, deals Common damage to all players within 20m of the caster as well as stuns affected players for 2s. This is a melee attack
Unlike the Troll Demolishers in the Troll WIng, these Demolisher’s can be crowd controlled with standard stuns/daze/fears.
Brutal Swing: melee, standard targeting, deals Common damage to all players in a Cone (90°, 5m) and knocks player backwards.
Putrescent Decent
Suffocating Spore Cloud
this creature has no auto attacks, however it will slowly move into melee with whoever is the current aggro target and while in combat will pulse for Shadow damage. This creature will pulse a final time ~4s after being defeated.
Power Drain: 5.5s interruptible Channel, deals 400 [untyped] damage to Power initially, and then 800 [untyped] damage to Power every 2s.
This creature spawns with a Shrouded Spores effect, making them immune to damage. Shrouded Spores is removed by applying any form of crowd control.
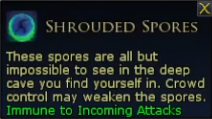
On Tier 2 all Suffocating Spore Clouds spawn with two Shrouded Spore effects
Note that while a creature is stunned, additional crowd control effects will not register and thus will not remove any of the Shrouded Spores effects. You must wait until the stun wears off, or use another form of crowd control first.
On Tier 3 all Suffocating Spore Clouds spawn with three Shrouded Spore effects
Giant Erupting Growth
These creatures do not move nor do they have any auto attacks.
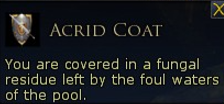
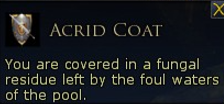
Great Eruption: 3s non-interruptible induction, deals Acid damage to all players within 20m of the caster. In addition this skill checks to see if the affected target has the Acrid Coat effect; if they do then they take a reduced secondary hit (Shielded Eruption) but if they do not then they take a very high damage secondary hit (Eruption).
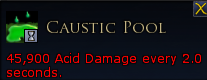
Acrid Coat can be gained by walking into the Caustic waters. Standing in the Caustic waters will deal Acid damage every 2s.
Badharál the Gorger
Badharál the Gorger
this creature does not move and has no auto attacks.
Spider’s Kiss {“A wondrous gift for you.”}: melee (3.5m), standard targeting, deals Common damage and applies Spider’s Kiss (curable, Poison) for 6s, which deals percentage (20%) Acid damage initially and then percentage (20%) Acid damage every 2s
Missing Tooltip
Savage Pincers {“You will feel my fury!”}: melee, targets a random player, deals Common damage to all players in a Cone (120°, 6m).
Savage Slash: melee (3.5m), targets a random player, deals Common damage
Poison Spit: ranged (40m), targets a random player, deals Acid damage
Horrid Venom: 3s interruptible induction, targets a random player, deals Common damage to all players within a Cone (60°, 30m).
Shake the Web {“Weavers - to me!”}: summons three Badharál’s Young.
Corrosive Bite {“Fear takes your heart.”}: melee (3.5m), standard targeting, deals Common damage and applies/tiers up Growing Corrosion (curable, Poison) for 60s. Growing Corrosion reduces mitigations by -5%, increasing with each stack; -10%/-20%/30%, up to a maximum of -50% at 5 stacks.
Missing Tooltip
Plump Spiderling
This creature has no offensive attacks, does not recognize threat, and moves on a determined path towards the boss.
Munch {“A delicious snack.”}: This skill is used once a Plump Spiderling gets within melee range of Badharál, healing the boss for a percentage (20%) of its max health, and destroying the Plump Spiderling in the process.
Missing Tooltip
The egg sacs can hatch into either a Venomous, Plump, or Blighted Spiderling depending on the type of egg sac is hatching.
Venomous Spiderling
Melee attacker whose melee auto attacks deal Common damage.
Impaling Strike:melee (10m), standard targeting, deals Common damage
Caustic Fluid: melee (3.5m), randomly targets a player within melee range, deals Common damage.
Badharál’s Swarm
melee attacker but has no auto attacks.
Impaling Strike: melee (10m), standard targeting, deals Common damage
Caustic Fluid: melee (3.5m), randomly targets a player within melee range, deals Common damage and applies Corrosive Poison for 45s. Corrosive Poison reduces mitigations by -15%.
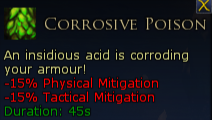
Due to this shorter fight timer it is very likely groups will be using the incoming healing debuff strategy. The Corrosive Poison debuff will cause the tanks to be taking additional damage and as such having both tanks split the Spiderlings and Youngs to improve survivability is advisable. Spider’s Gift is both a priority mechanic to cure, with Rune-keeper’s being exceptionally efficient at removing stacks but combining group removals, and possibly splitting the Defensive Supports into separate groups may be needed. That said Spider’s Gift does only have a 3.5m range and as such is a mechanic that can be completely avoided with proper spacing.
On Tier 3 there are no new mechanics however there are three changes that completely throw the fight into chaos.
Firstly the Caustic Birth duration is reduced by -30s (now 30s), which means that as one set is about to hatch the next set is now attackable. This means that you’ll end up with more waves of spiders even though the fight is shorter in duration.
Secondly there are now two Unnerving Weaver spiders. One will drop down in its standard position but the other will drop in on the opposite side of Badharál. The route these spiders walk is also changed, forgoing the big arena wide loop in favor of two smaller loops around their respective sides. When they come across the middle (between Badharál and the arena entrance) the Unnerving Weaver’s paths will zig zag into the other side and then back. This makes dodging them significantly harder and as such everyone’s cure pot should be saved in case they get Fearful Spores.
Lastly the enrage timer is reduced to only 4minutes. This means that the fight is now an all out damage check against the boss, while dodging both Unnerving Weavers, and ensuring that Badharál doesnt get any heals from Plump Spiderlings.
Badharál Young
melee attacker but has no auto attacks
Carapace Bash: melee (3.5m), standard targeting, deals Common damage.
Savage Blows: 3s interruptible induction, targets a random player within melee range, deals Common damage to all players in a Cone (120°, 6m). This is a melee attack.
Flurry of Barbs: melee, standard targeting, deals Common damage to all players in a Cone (120°, 6m).
For the most part all of the Venomous and Blighted Egg Sacs can be ignored and as such those spiderlings should be gathered together by the tank. They can held under Badharál to be cleaved down, however be aware of the Blighted Spiderling’s Blighted Eruption ability as the Consuming Blight hotspot is very large and deals very high damage. This will likely make melee characters struggle to reach the boss. Thus I alternately recommend the tank holding the spiderlings away from the boss, far enough away that none of the Venomous Spiderlings can target another player for Caustic Fluid.
Handling the Plump Spiderlings can fall into two strategies:
Diverting damage dealers off of the boss to the Plump Egg Sacs to destroy them before they hatch.
Ignoring the Plump Egg Sacs completely and keeping damage dealers on the boss the entire time and use incoming healing debuffs on Badharál to negate the heal.
The first option will lead to a more controlled fight as there should be no risk of Badharál healing; however, it will likely cause the fight to take longer.
The second option will lead to a shorter fight if executed properly but there is a level of complexity and timing needed to ensure that all of the necessary debuffs are applied and that all of the Plump Spiderlings arrive at Badharál at the same time. To for starters you will need a combined amount of incoming healing debuffs totaling 100% to negate the heal completely. To accomplish this you will want to plan the raid’s class composition, discuss relevant traiting, and have one member call out when to apply the debuffs just before the Plump gets to the boss. Classes with Incoming healing debuffs include:
Captain (Grievous Wounds trait): -40% for 6s
Burglar (Vital Cut trait): -25% for 12s
Rune-keeper (Essence of Winter): 15% for 15-26s
Hunter (The Black Arrow trait): -15% for 10s (-30% for 20s if target is under 50% moral)
Warden (No Respite for the Wicked trait): -30% for up to 51s
Brawler (Overhand Smash - Incoming Healing Debuff trait): 20% for 25s
In addition to needing to time all of the debuffs being applied at the correct time, you will need to ensure that all of the Plump Spiderlings reach Badharál at the same time. This can be challenging as there are four locations where a Plump Spiderling can spawn, and they are all different distances from where Badharál is positioned. This falls on the Defensive Supports as the only method of slowing the Plump Spiderlings down to better align them with each other is via Fellowship Maneuvers. At most a wave will be three Plump Spiderlings, which could mean that two of them will need to be slowed down with Fellowship Maneuvers. To this end I have found that a Trapper Hunter wearing four pieces of the Outrider raid set can cover this task on their own as the set grants a second Fellowship Maneuver starter to Piercing Arrow.
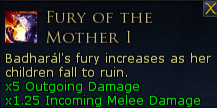
After 6minutes and 30seconds Badharál will gain Fury of the Mother. This is her enrage mechanic.
On Tier 2 the fight is fundamentally the same however all of the Spiderlings become much more dangerous
All sources of the attack Caustic Fluid also apply Corrosive Poison for 45s; reduces mitigations by -15%. This includes attacks from the Venomous Spiderlings and the Badharál’s Swarm.
Caustic Birth duration reduced by -15s (now 45s)
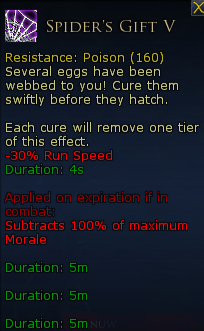
Spider’s Gift {“A wondrous gift for you.”}: melee (3.5m), targets a random player, deals no initial damage but applies Spider’s Gift VI (curable, Poison) for 4s. Spider’s Gift VI is a stack of six curable effects that if not removed before the duration expires will kill the affected player and spawn and spawns up to three Badharál’s Swarm within 1m of the effected player for 300s.
If all stacks of Spider’s Gift are removed before any of them are able to expire then no other effects occur and no Swarms created.
Enrage timer reduced to 5minutes and 30seconds.
Strategy
There is one thing to make note of before anything else though and that being the range of Badharál’s skills. Specifically Spider’s Kiss and Savage Pincers which can only hit within 3.5m of Badharál. This is slightly less than the range of player skills and thus if positioned correctly those two attacks can be completely ignored. This is very fortunate as Savage Slash deals a lot of damage to random players with zero warning so avoiding that attack will greatly increase the survivability of the raid group. Avoiding Spider’s Kiss is less important as tanks likely wont be near the boss all that much in this fight, but it is something to note regardless.
The next core mechanic is not one of the bosses attacks, but rather when Badharal reaches 85% morale, an Unnerving Weaver will drop down in the South West corner of the area. The Unnerving Weaver does not become attackable at any point nor does it have any actual skills it can use, rather it will path along a predictable path repeatedly throughout the fight. The catch is that the Unnerving Weaver has an aura effect called Spores of Fear (7m radius) which will apply Fearful Spores (curable, Fear) to a player for 9s.
Missing Tooltip
When Shake the Web is used three Badharál Young will drop in from the ceiling spread out in the arena. These are a nasty threat to the group as their Savage Blows inductions deal a lot of damage in an area of effect and it can be used rather quickly. If these enemies are kept in the group then Defensive Supports should be prepared to use crowd control to interrupt the castings and negate the abilities.
At the start of the fight there will be a wave of three Badharál Young will drop in and as such those can be gathered and held next to the boss to be damaged via area of effect skills During this time Defensive Supports should coordinate using various crowd control skills to interrupt the Savage Blow inductions as that skill can deal significant damage to the group. Once this first set of Youngs is defeated all subsequent Shake the Web castings should be gathered by one of the tanks and held away from the group. They can be held under Badharál to be cleaved if desired, but it will result in more group damage if Savage Blow castings are permitted to go off.
The path the Unnerving Weaver moves is roughly counter clockwise and while it has some variation, it does run in a predictable pattern. Specifically when it moves against the south wall it will alternate between pathing along the wall (through where the boss is) or turning and moving through the middle of the room as it makes its trek east. This means that anyone within melee range will need to know which part of the pattern the Unnerving Weaver is on so that they can move towards the middle of the arena or against the south wall to avoid the fear.
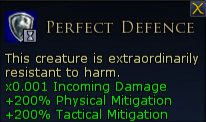
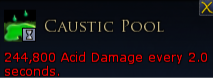
The second core mechanic are the numerous egg sacs that litter the arena. These all are created on the fight starting and all have Perfect Defense. After about 15s into the fight the boss will say “My children will arrive soon.” and as such 3 random egg sacs will begin to pulsate and turn green. Each of the pulsating egg sacs will lose its Perfect Defense and gain Caustic Birth for 60s, after which if the egg sac is not destroyed in that time a spiderling will be spawned; it being a variant matching the type of egg sac, and a large Caustic Pool hotspot (~10m radius) is created which deals 61200 Acid damage initially and then 244800 Acid damage every 2s. This hotspot lasts for 15s.
Blighted Spiderling
Melee attacker whose melee auto attacks deal Common damage.
Poisoned Barbs: melee (10m), standard targeting, deals Common damage
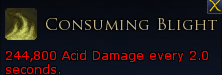
Blighted Eruption: 4s non-interruptible induction, creates a Consuming Blight hotspot (~10m radius) that deals 244,800 Acid damage every 2s. Consuming Blight hotspot lasts for 120s. This skill can only be used when the caster is below 20% morale, and will destroy the caster in the process.
This induction shows as if it is a ‘heal’ to the spider (green circle under the feet) and since this creature is immune to Crowd Control effects there are limited means of interrupting this induction. Blighted Spiderlings are susceptible to Fellowship Maneuvers.
Maukhorn
Maukhorn
Melee attacker whose melee auto attacks deal Common damage in a Cone (120°, 5m).
Smack: melee (5m), standard targeting but can only target pets, deals insanely high Common damage and applies Disregarded until combat ends. Disregarded multiplies the Perceived Threat of the afflicted pet by 0.
This skill is only usable on pets and is a means of not allowing a player pet tank the entity.
Cleave Armour {“Crush shell.”}: ranged (5m), standard targeting, deals Common damage to the target and applies Smashed Armour for 30s, which reduces mitigations by -5%.
Missing Tooltip
Stomp {“Break bones.” or “Smash and crush!”}: melee (40m), deals Common damage to all players within 40m of the Maukhorn.
Upheaval {“Rocks smash!” or “Rocks crush!“}: ranged (40m), targets a random player or pet other than the aggro target, deals no damage but applies Upheaval for 8s. On expiration, Upheaval creates a hotspot (~5m) at the affected player’s locations. This hotspot lasts for 1s and deals Common damage to all players within the area of effect.
This places a Green Eye over the head of the targeted player.
Missing Tooltip
Blighted Bloom {“Feast!” or “Consume!”}: ranged (40m), targets a random player other than the threat target, deals no damage but applies Blighted Bloom for 5s. On expiration, Blighted Bloom creates a Blighted Bloom mushroom at the player’s location.
Cascading Bloom {“Grow.” or “Blight feast.”}: ranged (40m), targets a random player other than the threat target, deals no damage but applies Cascading Bloom for 5s. On expiration, Cascading Bloom creates a Cascading Bloom mushroom at the player’s location.
Missing Tooltip
Tremor: melee (120m), standard targeting, deals no damage to the target and applies Unstable for 8s.
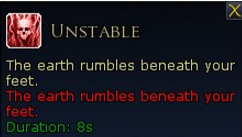
Avalanche {“Stones obey.” or “Stones destroy!”}: 0.5s non-interruptible induction, targets the player with Unstable, deals Common damage to all players in a Line (3m wide by 40m long) and destroys any Cascading Bloom mushrooms in the Area of Effect.
Strategy
The core mechanic for this fight is the interaction between the Cascading Bloom mushrooms and Maukhorn’s Avalanche skill. The Cascading Blooms spawn in with Perfect Defense, making them undamageable and while you can interrupt their casts eventually they will just begin to overwhelm the healers. The only way to remove the Cascading Blooms is to have them be hit by the Avalanche line attack. This will instantly clear them from the arena. Thus the basic strategy is to have one of the tanks stand on one side of the boss and the rest of the group is positioned on the other side and no one moves out of the group for Cascading Bloods. Then after a number of Cascading Bloom’s are dropped everyone rotates the same direction, positioning the tank next to all of the Cascading’s to be cleansed. On Tier 1 there is no need for a second tank.
Cascading Bloom
This is an object that spawns with Perfect Defense and does not move. Only casts chain casts Cascading Bloom.
Cascading Bloom: 8s interruptible induction, deals Common damage to all players within 40m of the caster.
Upheaval can be ignored and Blighted Mushrooms can be dropped wherever as the damage they deal is not a threat at this tier.
Blighted Bloom
This is an object that does not move. Only casts Blighted Bloom and then despawns.
Blighted Bloom: 10s non-interruptible induction, deals Common damage to all players within 40m of the caster and destroys the Blighted Bloom mushroom.
Cheese Strategy
Alternatively this fight can be cheesed on all tiers of play. By having the tanks swap aggro as soon as one of them gets the Unstable debuff this will cause the boss to be unable to use any skills other than auto attacks. No Stomps will occur, no Blighted or Cascading Mushrooms will spawn. At this point the fight is just a damage parse until the boss is defeated since as long as the tanks continue to swap back and forth at the correct time no other skill will be able to be used.
On Tier 2 the core of the fight remains the same however managing the mushrooms becomes a much higher priority.
Upheaval hotspot base damage increased by +100% and applies a 3s knockdown.
Stomp base damage increased by +67%
Cascading Bloom cooldown reduced by -15s (now 15s cooldown)
Avalanche base damage increased by +50%
Cleave Armour base damage increased by +20%; Smashed Armour debuff magnitude increased to -10% physical and tactical mitigations, and now stacks up to three times.
Smashed Armour - 2 reduces physical mitigations by -20% and tactical mitigations by -15%
Smashed Armour - 3 reduces physical mitigations by -40% and tactical mitigations by -20%
Missing Tooltip
Missing Tooltip
Missing Tooltip
Cascading Bloom induction reduced by -2s (6s induction now) and base damage increased by +40%
Blighted Mushrooms will likely kill anyone not at full health if they get their induction off, and between Cascading Mushrooms both appearing more frequently and induction faster, not to mention the boss’ Stomp skill constantly chipping away at people’s moral it is advisable to develop a strategy to rotate defensive cooldowns for each Blighted Bloom in the event that it isn't destroyed fast enough. Alternatively damage dealers could swap to the Blighted Bloom mushrooms as soon as they spawn and destroy them before they have a chance to finish their casting, but this is a damage loss to Maukhorn and thus the fight will take longer.
Players with Upheaval should move out of the group so that other players aren’t to hit by the knockdown, but they shouldn’t go too far as its possible for them to also be dropping other mushrooms at the same time.
As for Cleave Armour, tanks should swap when one of them reaches the second stack, or right after one gains the third stack. Swapping more frequently will likely cause both tanks to have the debuffs at the same time which drastically increases the damage that they take and the timings should like up pretty nicely with Cascading Blooms where you’ll have two Cascadings to remove with each tank swap.
In addition to the higher threat from everything, a new enrage mechanic is introduced. 87 seconds after the fight starts the boss will get Inflicted by Enraging Spore and then Enraging Spores, which increases outgoing damage and decreases incoming damage. At the same time an Agitated Spores puddle will form in one of six sections of the room. Players will take damage if they stand in this puddle, however if the boss is brought into that puddle then the Enraging Spores is removed. Each puddle can only remove Enraging Spores once.
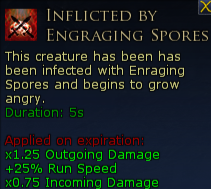
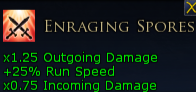
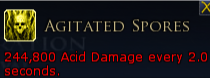
*Note this effect has a spelling error in its name.
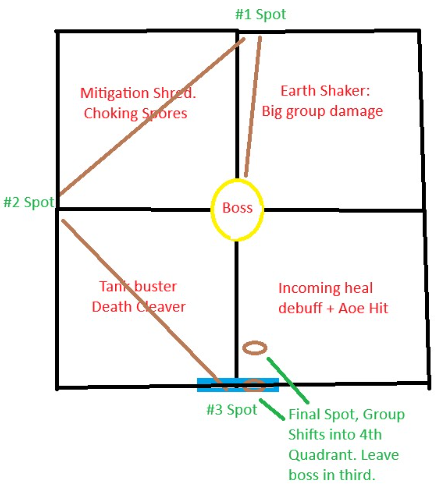
This pattern will then repeat every 60 seconds, eventually covering the entire room in Agitated Spores puddles. This means that you have about 6 minutes and 45 seconds to defeat this boss before the entire room is covered, and then another 60 seconds before the boss gains Enraging Spores again with no way to remove. These Agitated Spores puddles do appear in a set order depending on the where the hotspot spawns first, thus moving Maukhorn around the arena can me minimalized to one of two spots where quadrants can overlap (orange circle on map).
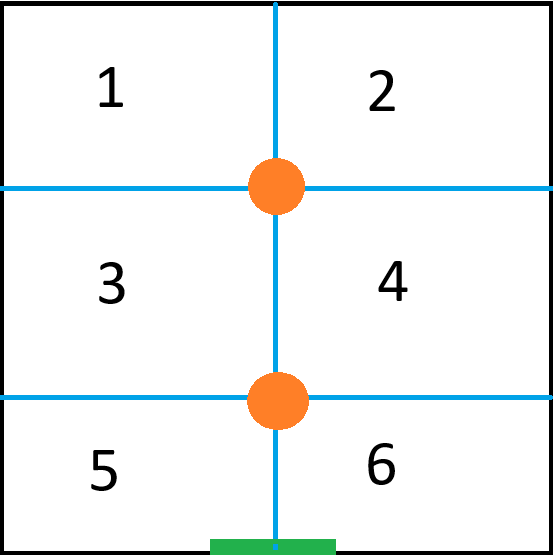
Pattern A: 1,2,4,3,5,6
Pattern B: 4,2,1,3,5,6
Pattern C: 3,5,6,4,2,1
Pattern D: 6,5,3,4,2,1
On Tier 3 there are no additional mechanics but some skills are upgraded with additional damage.
Upheaval hotspot base damage increased by +167% and applies a 3s knockdown.
Stomp base damage increased by +150%
Cascading Bloom cooldown reduced by -20s (now 10s cooldown)
Avalanche base damage increased by +100%
Cleave Armour base damage increased by +100%; Smashed Armour debuff magnitude increased to -25% physical and -15% tactical mitigations, and now stacks up to two times.
Smashed Armour - 2 reduces physical mitigations by -50% and tactical mitigations by -30%
If allowed to apply a third time the player will be hit by Cloven Armour, dealing high Acid damage.
Missing Tooltip
Missing Tooltip
Blighted Bloom base damage increased by +60%
Cascading Bloom induction reduced by -4s (now 6s induction) and base damage increased by +100%
The only other change to this fight is that the first Agitated Spores puddle will spawn after only 57s into the fight. Subsequent Agitated Spores puddles will continue to spawn every 60s after the initial spawn.
Legion of Lhaereth
Blood Sorceress Agaris
Melee attacker whose melee auto attacks deal Common damage.
Strike of the Undeceived: melee (7m), standard targeting but can only target pets, deals high Common damage and removes the pet from all threat tables.
This skill is only usable on pets and is a means of not allowing a player pet tank the entity.
Blood Drain {“Delicious…” or “Mmmm…”}: 8s interruptible Channel, standard targeting, deals no damage directly but will apply Clawing Shadows for 90s. Clawing Shadows deals Shadow damage initially and then Shadow damage every 3s. This is a tactical attack.
In addition Agaris is healed for a percentage (5%) of her maximum morale initially and every 3s until interrupted.
Incoming healing debuffs are effective at reducing/nullifying the heal Agaris gains from the initial tick of Blood Drain.
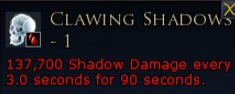
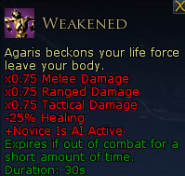
Beckon {“You cannot resist me!” or “Come to me, little morsels!”}: 6s non-interruptible induction, targets a random player within (100m) that is not a tank, creates a Life Force entity for 15s and applies Weakened for 30s.
This attack will put a purple eye over the head of the target.
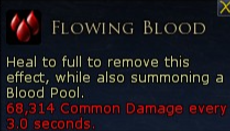
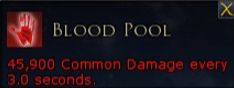
Bleed for Me {“Ahhh, what a feast!” or “Keep bleeding for me, little ones!”}: 5s non-interruptible induction. Deals Common damage to all players within 50m of caster and applies Flowing Blood. Flowing Blood deals Common damage initially and then Common damage every 3s until the affected player is healed to full. On being healed to full Flowing Blood is removed but a Blood Pool hotspot (~5m radius) is created at the location of the healed player. Blood Pool hotspot lasts for 300s and deals Common damage initially and Common damage every 3s
If this skill is Empowered (Bleed for Me - Empowered), the base damage of the initial Common damage hit is increased by +50%.
If this skill is Empowered twice (Bleed for Me - Empowered II), the base damage of the initial Common damage hit is increased by +100%.
Commander Mornang
Melee attacker whose melee auto attacks deal Common damage.
Strike of the Undeceived: melee (7m), standard targeting but can only target pets, deals high Common damage and removes the pet from all threat tables.
This skill is only usable on pets and is a means of not allowing a player pet tank the entity.
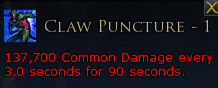
Claw Puncture {“Weak!”}: melee (3m), standard targeting, deals Common damage and applies Claw Puncture for 90s. Claw Puncture deals Common damage initially and then Common damage every 3s.
Knife Throw: ranged (5m to 40m), standard targeting, deals Common damage.
Piercing Shriek: 4s non-interruptible induction, deals Shadow damage to all players within 50m of Mornang, interrupts inductions, and applies Piercing Shriek for 6s. Piercing Shriek deals Common damage every 3s.
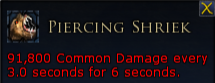
Call the Legion {“Come, Legion of Lhaereth!” or “Legion! Your Commander calls!”}: summons waves of enemies. This skill can be Empowered, and if it is then additional waves of adds are spawned ~10s after the previous wave.
Wave 1 (no Empowerment): 2 Armoured Morvuls (only in phase 1)
Wave 2 (Empowered): 2 Seregost Black Uruks
Wave 3 (Empowered II): 1 Troll Demolisher
Cristhir the Night-shadow
Melee attacker whose melee auto attacks deal Common damage.
Strike of the Undeceived: melee (7m), standard targeting but can only target pets, deals high Common damage and removes the pet from all threat tables.
This skill is only usable on pets and is a means of not allowing a player pet tank the entity.
Twist the Knife: melee (3m), standard targeting, deals Common damage and applies Poisoned Blood for 90s, which deals Acid damage initially and then Acid damage every 3s.
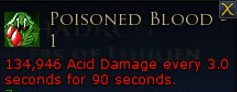
Knife Throw: ranged (5m to 40m), standard targeting, deals Common damage.
Fan of Knives {“Poisoned blades, find your marks!'“ or “None of you are safe from my blades!”}: 2s non-interruptible induction, deals Common damage to all players within 50m of Cristhir and applies Poisoned Knives (curable, Poison) for 30s. Poisoned Knives deals Acid damage initially and then Acid damage every 3s.
If this skill is Empowered (Fan of Knives - Empowered) then this attack will repeat a second time immediately following the first and applying two Poisoned Knives effects.
If this skill is Empowered twice (Fan of Knives - Empowered II) then this attack will repeat up to three times in succession and apply three Poisoned Knives effects.
Missing Tooltip
Call Stalkers {“Strike from the shadows, sisters!” or “Stalk our prey, sisters!”): this summons 2 Morroval Stalkers. These appear to spawn in the south west corner and north east corner.
Life Force
This entity has no attacks and only will path towards Agaris for its duration (15s).
If the Life Force gets within melee range of Agaris then the boss will gain a Life Force Consumed effect, increasing outgoing damage by +50%, and the original player will gain the Drained effect for 120s. Drained multiplies outgoing damage by x0.5 and multiplies outgoing healing by x0.5.
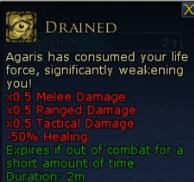
Armoured Morvul
Melee attacker whose melee auto attacks deal Common damage.
Flying Charge: 3s non-interruptible induction, targets a random player within 100m, deals no damage directly but applies Charge Target to the target for 5s. The caster gains Flying Charge for 5s which increases runspeed by x2 and gains Darkwing Talons. Darkwing Talons grants an aura (3m radius) to the caster which will cause it to knock back any players within the aura every 1s, as well as deal Common damage to any players within the aura initially and then deal Common damage every 3s.
Charge Slash: melee (3m), targets a random player, deals Common damage. This attack is a part of a sequence and will be used immediately after Flying Charge finishes.
Claw Slash: 2s non-interruptible induction, targets a random player, deals acid damage. This is a tactical attack.
Blood Sorceress Agaris will conjure a Blood Orb near the entrance to the arena.
Commander Mornang will call in four Morvul Darkwing (Darkwing Flight), two on either side of the arena. These enemies are not attackable and will do their Flying Charge attack across the arena, designated by the Line attack indicators. Being hit by one of these Flying Charges will knock the player back
Cristhir the Night-shadow will conjure Rain of Knives. This will cause all players within the arena to drop a puddle at their location that deals Common damage over time. These hotspots only last ~4s, but this attack will repeat every 4s for 12s, creating a total of 3 hotspots per player.
There appears to be a grace period of ~2s on entering one of these puddles before you get the Rain of Knives effect to show. There may be partial ticks however.
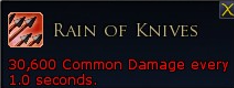
Agaris gains Animate Blood:
Animate Blood {“Your blood is mine to control!” or “Your own blood turns against you!”}: Consumes all active Blood Pools and spawns 12 Animated Bloods spread out along the perimeter of the arena. These Animate Blood will then path towards the group where they will then start inducting Heated Blood.
Mornang gains Weapon Snatch:
Weapon Snatch {“Your pathetic weapons cannot save you now!” or “You are nothing without your weapons, mortals!”}: 4s non-interruptible induction, deals low Common damage to all players within 50m of the caster and applies Stolen Weapon, duration infinite. Stolen Weapon applies a Disarm, a Silence, and multiplies outgoing damage and healing by x0.5. These effects are reapplied every 3s. In addition when the induction ends all players are pulled slightly towards Commander Mornang’s location. This is a ranged attack.
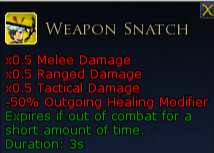
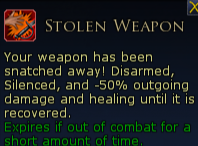
Call the Legion gains increased spawns:
Wave 1 (no Empowerment): +2 Armoured Morvuls (4 total, only in phase 1)
Wave 2 (Empowered): +1 Seregost Black Uruks (3 total)
Wave 3 (Empowered II): +1 Troll Demolisher (2 total)
In addition all enemies spawned in with this skill have Adaptation.
Cristhir gains Assassination.
Assassination {“Them! Target THEM, sisters!” or “Quickly, target the weak ones!”}: Summons 2 Morroval Assassins.
Call Stalker’s now summons four Stalker’s. These appear to drop in from the four corners of the arena. In addition all enemies spawned in with this skill have Adaptation.
Stalkers will project a Stalker’s Presence aura that affects the entire arena. This aura deals Shadow damage every 3s that the Stalker is alive and this aura can stack.
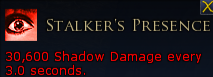
the Phase 1 structure remains the same with each boss gaining one ability to throw a wrench into things.
When dealing with Blood Sorceress Agaris’ Animate Blood ability, group up in the middle of the room the best you can and as soon as you see the Animated Blood begin to induct, run away from them so that you avoid the fire damage burst. This will cause all of the Animated Blood’s to form their new Blood Pools all together in the middle of the arena, which would then be cleared when you phase the boss.
When dealing with Commander Mornang’s Weapon Snatch ability, simply start by holding the boss in the middle of the arena and once the induction begins start running towards the perimeter of the arena. Try to spread out so that only a few people are going in the same direction as there are only so many weapon hotspots to pick up, and once picked up and your debuff removed just return to the middle to continue damaging.
When dealing with Cristhir the Night-shadow’s new Assassination ability, start by holding the boss in the middle of the arena and have both of your healers stack on each other. This will force the two assassins to be next to each other for easy area of effect damage as you quickly kill one assassin and then the other. Ideally you free both healers before the Stalker’s are called into the fight as that will be a window in which everyone in the raid will be taking significant damage and you will want both of your healers active.
When fighting the last boss of Phase 1, try and have one of the tanks collect as many tiers of the damage over time/debuffs from that last boss as possible. This gives the other tank time for any damage over time/debuffs to fall off. Just before you phase this last boss to 33% morale, have healers stop healing this tank and have some form of revive ready as you want this player to be defeated and resurrected to clear the effects before Phase 2 starts. If you have a non-healing Rune Keeper this is a great time to use their Do Not Fall This Day, saving any healer revives for Phase 2.
Phase 2 once again is similar in structure to T1, however the debuffs and damage over time effects applied by the bosses to the tanks will start to be a problem pretty quickly if this phase drags on too long.
A new mechanic for this phase will start immediately on the phase beginning. Two Blight-spreading Bats will spawn in various places of the arena’s perimeter and will target up to two players. These players will want to run towards these bats and purposely get bitten by this bat. After the bat has bitten its target it will induct Blight Bomb; destroying the bat but creating a damaging hotspot that remains for 300s. It is possible that both bats target the same person. In that instance the affected player should kite the bats around slightly until both bats are near and get bit by both bats at the same time. If done correctly then both bats will Induct Blight Bomb, but if the timing is off then one of the bats may target a different player. These bats will continue to spawn every 60s until the fight ends.
In Phase 2 Cristhir the Night-shadow can now use their Rain of Knives ability even though they are in the arena with you.
Mornang gains a new sequins of attacks:
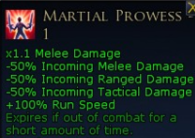
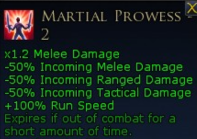
Martial Prowess {“Witness my martial prowess!” Or “You will feel my wrath!”}: Melee (3m), targets random player, deals Common damage. This also applies Martial Prowess to Commander Mornang, reducing the incoming damage the boss takes by -50%, multiplying its run speed by x2, and multiplying outgoing damage by x1.1. This is the opening attack to a sequence.
Claw Swipe: 2s non-interruptible induction, targets the most recent target of Martial Prowless, deals Common damage to all players within Area of Effect (3.5m radius) and applies Claw Swipe (curable, Wound). Claw Swipe deals Common damage initially and Common damage every 3s for 30s. This is a Melee attack.
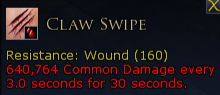
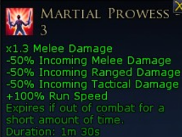
After using Claw Swipe Mornang will use a version of Martial Prowess {“I grow ever stronger!”} (same targeting, same damage) that then tiers up the damage buff by 10% each time the two attack chain occurs (x1.1->x1.2).
After the third Martial Prowess Mornang will lose their immunity to fellowship maneuver's effect. Triggering and completing a maneuver will end the sequence and remove the Martial Prowless buff from Mornang.
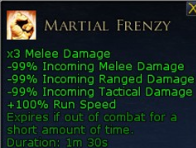
The Martial Prowless buff can stack up to 8 times; however upon reaching tier 8 the effect is replaced by Martial Frenzy. This reduces incoming damage by -99%, multiplies run speed by x2, and multiplies outgoing damage by x3. This is highly unlikely to ever be seen as even letting Martial Prowess stack past x1.3 damage will probably result in defeat.
Assassination cooldown increased by +30s (now 90s).
Call Stalkers cooldown increased by +30s (now 90s)
Cristhir gains Nightfall:
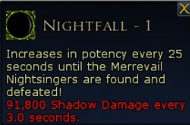
Nightfall {“Night falls, the hunters feast!” or “Like lambs to the slaughter…”}: 5s non-interruptible induction. Deals no damage initially but plunges the arena in darkness and applies Nightfall-1 to all players. Nightfall deals Shadow damage every 3s, and will tier up every 25s, dealing greater damage.
This will also spawn 4 Morroval Nightsingers within the arena, however they are stealthed initially. There are 6 possible spawn places; one by the Pillar’s, one by the entrance, and two on either side of the arena.
The Nightfall mechanic is dispelled and the damage over time removed by defeating the four Morroval Nightsingers.
At this tier of difficulty the damage check is effectively spread across the entire fight rather than just needing a burst window. During Phase 1 ideally you only deal with the new Tier 3 mechanics a single time, or possibly not at all as the resources required to endure those effects are pretty costly.
Cristhir Phase
The order in which you fight the bosses changes at this point as the goal is to phase Cristhir before she has the chance to cast Nightfall, as it is an extended mechanic that requires significant healing during a part of the fight where healers can be Subdued by the Assassins. Thus you shift Cristhir to the first to be fought, and with using all damage buffs and induction increasing effects you have ~95s to phase Cristhir. Because Cristhir is going first that means you will have to deal with both Darkwing Flight lines and a Blood Orb, the latter showing up near the end of the time frame and as such should be swapped to after Cristhir phases.
Mornang Phase
This will have Mornang be the second boss to fight and it too comes with a moderate damage requirement as you should aim to phase them before their second casting of Call the Legion. The first casting will only include the Armoured Morvul and the three Uruk’s; the latter should have Tanks and Defensive Supports claim so that they dont get any castings of Interrupting Shout off as their damage can easily drop a non-tank at this difficulty. After the Uruks join the fight Mornang will be able to use Weapon Snatch. Have one of the tanks hold all of the enemies in the middle of the room while everyone goes and picks up their weapon, and then switch tanks as the first one gets back. This keeps all of the enemies controlled in the middle instead of running around, as well as gives all of the players a centralized location to group up in for Martial Prowess. Martial Prowess can be managed in two ways; either you spread out and let the boss jump to a player then that player runs away to avoid the Claw Swipe, or the raid group gathers together and defensive cooldowns are used to survive the Claw Swipe as it is quickly cured via group-wide cures. The latter allows for enemies to remain fairly grouped together to be cleaved down and as such is the one I recommend. This does come at a cost though as those defensive cooldowns (typically One for All and Warding Knowledge) will only cover the first casting and wont be back for any subsequent uses of Martial Prowess. This shouldn’t be a concern though as if this phase lasts long enough to have a second Martial Prowess then there is another more immediately destructive issue to overcome.
Take note that there is a situation where Mornang uses Martial Prowess before they use Weapon Snatch. This can happen because Weapon Snatch is not an infinity priority skill (meaning it will instantly get used when off cooldown) and as such it is possible for Mornang to just “choose” not to use Weapon Snatch for 10s or so and thus fall behind Martial Prowess in the queue. If this happens then it actually makes the phase slightly easier as this would delay the second casting of Weapon Snatch meaning there is no disruption to damage dealers and thus more time spend damaging Mornang.
After the second Claw Swipe, Mornang will become able to be Fellowship Maneuvered and as such the Defensive Support and at least one other player need to complete a successful Maneuver (RR or YY are probably the easiest to do). This will end the Martial Prowess mechanic and outside of the possible second casting of Weapon Snatch the fight is just a race to phase before the second casting of Call the Legion. The reason it is important to phase before the second Call the Legion cast is because that second casting will include two Trolls. Nearing the end of this phase its possible for the second Blood Orb to be conjured and as such the damage to the raid will be quite high, especially if it happens to line up with a Piercing Shriek.
Agaris Phase
In contrast to the other two bosses on this tier, as well as the Agaris phases on previous tiers, the Blood Storm mechanic is both easily managed and doesn’t require any cooldown uses to endure and it results in being a rather calm fight before heading into Phase 2.
The change to Beckon is almost ignorable as the targeted player should be running away from the boss and by extension the group already, and as long as the Life Force is slowed and the tanks move away from it properly there the mechanic is just like it is on lower tiers and only punishing if it isn’t respected.
The only real change to the strategy is where you group to let the Animated Blood’s pop and create the Blood Pools, as you want to keep the middle of the arena as clear as possible. As such you can sort of move about the arena in almost a looping pattern. Starting the fight off against either of the side walls for the initial Bleed For Me casting and Blood Pool placements. Then move to one of the corners while out spacing the Life Force. Allow the Animated Bloods to gather there and the group moves to the next corner, where the boss would then cast Blood Storm.
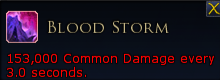
The casting of Blood Storm also can be used to negated the effect as well since Agaris will knock the players away from her as part of the casting. As such position yourself in between Agaris and the middle of the room and that knock back will send you right into the ‘Eye of the Storm’ which will cleans the Blood Storm effect from you. Ranged interrupts be away that she may cast her Blood Drain channel which should get interrupted as soon as possible to avoid her healing, and then she moves to the group which is in the middle of the arena. The next skill she uses is Beckon, which you use to position at another corner and start the sequence of skills again.
Due to this phase not being a particularly tight damage check this time can be used to get major cooldowns back before heading into Phase 2.
Phase 2 is practically the same on Tier 3 as it is on Tier 2 with only an additional Blight-Spreading Bat that will spawn with the other two. Ideally all three bats target the same player so that only one player is missing out on the damage window at the start of the phase; even more perfect if it is one of the Healers or Defensive Supports as that keeps the damage dealers in the fight more. Players should try and get all three bats to bite them at the same time so that the mechanic ends there and none of the bats can retarget a different player. The only other new mechanic for this phase is that Agaris can now use Blood Orb while she is in the arena fighting with you.
Tanks should gather the three bosses right where they drop down at and hold them there until the Uruks come in at 20s. Once the Uruks join the fight the first major hurdle will come up as their first casting of Interrupting Shout is often during the time where the Defensive Supports need to be crowd controlling their Trolls. Once that casting has been interrupted the group can start to repositon along one of the side walls. Defensive Supports pick up their assigned Uruk and join interrupting duty once their Troll is dazed.
During this time the first Rain of Knives should begin followed shortly by Agaris using Bleed For Me. It is important that Agaris is defeated before she has the ability to cast Animate Blood at 55s into Phase 2. The reasoning is that the Animate Blood mechanic would force rapid relocation of the entire raid group but also at around the 55s mark is when the Blood Orb would be conjured. This would cause significant damage to the entire raid during the part of the fight where everyone is already taking significant damage and as such it is advisable to remove Agaris from the fight before either mechanics can be used.
After Agaris is defeated the hardest part of the fight is pasted but it certainly isnt going to be a walk in the park. The Tank holding the bosses is likely going to drop at this point due to 5-6 of the tank debuffs and damage over times. That Tank should have a revive planned ahead so that they are able to be instantly brought back into the fight, and if the Uruks haven’t gained Adaptation yet crowd control can be used to keep the Uruks from running off. Cristhir is the second boss to focus to remove the Poisoned Knives casts, and lastly Mornang.
On Tier 2 a few of the existing skills get augmentations and each of the bosses gain an additional ability.
Blood Drain now applies/tiers up Clawing Shadows, dealing more damage per tier (max 5). In addition Blood Drain applies/tiers up Lingering Magic for 90s, reducing shadow mitigation by -20% per tier (max 5, -100% shadow mitigations)
Missing Tooltip
Claw Puncture now applies/tiers up Claw Puncture, dealing more damage per tier (max 5). In addition Claw Puncture applies/tiers up Punctured Armour for 90s, reducing physical mitigation by -20% per tier (max 5, -100% physical mitigations)
Missing Tooltip
Twist the Knife now applies/tiers up Poisoned Blood, dealing more damage per tier (max 5). In addition Twist the Knife applies/tiers up Coagulating Poison for 90s, reducing incoming healing modifier by -20% per tier (max 5, -100% incoming healing modifier).
Missing Tooltip
To remove these effects is you have to run over to a newly created hotspot along the outside of the arena and ‘pick up’ a new weapon. This does not require any additional action other than running into this hotspot, however the hotspot is destroyed when doing so don’t everyone run towards the same one.
Animated Blood
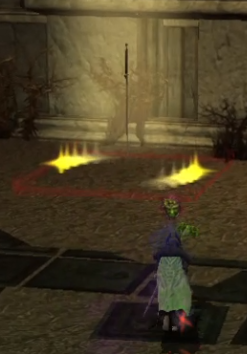
This entity has no auto attack. When this entity dies it will create a Blood Pool hotspot at its location.
Heated Blood: 5s non-interruptible induction, deals Fire damage to all players within 10m of the caster, destroys the caster, and creates Blood Pools at the location of the Animated Blood. This is a tactical attack.
Morroval Assassin
This creature has no auto attacks
Subdue Prey: melee (3m), targets random healer, deals Common damage to the target and applies Subdued Prey for 5s. Subdued Prey is a FullDisable effect (unable to use skills or move).
Assassinate: 20s non-interruptible Channel, which repeatedly reapplies Subdue Prey every 2s. At the end of the channel the target takes lethal Common damage. This is a melee attack.
Defeating the assassin will create a small hotspot which cleanses the Subdue Prey effect.
Blight-Spreading Bat
This creature has no auto attacks, and has an innately reduced run speed of x0.5.
Mark of Attack: 2s non-interruptible induction. Targets a random player that isn't a tank, deals no damage but applies Bat Target. This is a tactical attack
Bat Bight: tactical (2m), targets the player that has the Bat Target effect applied by the same bat, deals Acid damage and removes Bat Target from affected player.
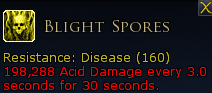
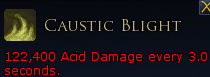
Blight Bomb: 5s non-interruptible induction. Deals Acid damage to all players within 7m of the caster and applies Blight Spores for 30s. Blight Spores deals Acid damage initially and then Acid damage every 3s. In addition this attack creates a Caustic Blight hotspot (~5m radius) for 300s; dealing Acid damage every 3s. This attack also destroys the caster.
Seregost Black Uruk
Melee attacker whose melee auto attacks deal Common damage.
Interrupting Shout: 2s interruptible induction, deals Common damage to all players within 50m of the caster, and interrupts inductions. This is a melee attack.
Axe Throw: 2s non-interruptible induction, targets a random player, deals Acid damage. This is a tactical attack.
Troll Demolisher
Melee attacker whose melee auto attacks deal Common damage.
Ground Slam: 3s non-interruptible induction, deals Common damage to all players within 20m of the caster as well as stuns affected players for 2s. This is a melee attack
Unlike the Troll Demolishers in the Troll WIng, these Demolisher’s can be crowd controlled with standard stuns/daze/fears.
Brutal Swing: melee, standard targeting, deals Common damage to all players in a Cone (90°, 5m) and knocks player backwards.
Strategy
This fight can feel like a bunch of chaos at first, with mechanics happening without warning but there is a method to the madness. To start with this fight has two phases, but phase 1 is broken up into 3 parts (one per boss).
Phase 1
Players can choose which of the three bosses they wish to fight first, but that will lock in the order of the remaining two.
(First → Second → Third)
Commander Mornang → Blood Sorceress Agaris→ Cristhir the Night-shadow
Blood Sorceress Agaris → Cristhir the Night-shadow→ Commander Mornang
Cristhir the Night-shadow → Commander Mornang→ Blood Sorceress Agaris
The reason that the order matters is due to how this fight operates. Each of the bosses has an additional mechanic, here to referred to as their “Pillar Skill”. This skill can only be used during Phase 1 when that boss is perched on their pillar and not in the arena fighting the players. Each of these skills operated on its own cooldown and once a boss has reached 33% and retreated back to their pillar they are no longer able to use their Pillar Skill until Phase 2.
Blood Orb
This entity does not move but channels Blood Gather repeatedly while it exists.
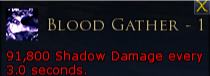
Blood Gather: 60s non-interruptible Channel. Deals 91,800 every 3s. Damage increases the longer the Blood Orb exsists.
In addition to the Pillar Skills, each boss has one of their active abilities they can use when fighting in the arena with the players can be “Empowered.” For the first boss fought in Phase 1 it’s skills will not be empowered at all. The second will gain its “Empowered” augmented skill, and the final boss fought in Phase 1 will have its skill gain “Empowered II”.
This means that the order that you fight the bosses in dictates not only which Pillar Skill you will have to contend with the longest, but also which Empowered/Empowered II skill you will have to endure as the Phase ends.
Strategy for phase 1 shouldn't change too much from boss to boss, the main thing to focus on is when fighting Agaris the whoever is tanking will want to start kiting when the Life Force gets close to Agaris to avoid the Weakened player getting Drained and Agaris from getting the Life Force Consumed effect. The Life Force can not be crowd controlled but it can be slowed. If Agaris gains any or multiple of the Life Force Consumed effect(s) these will be removed when she retreats to her pillar at 33%
The Pillar Skills are the priority at any given time as the Rain of Knives puddles deal a lot of damage if not moved out of quickly. When Blood Orb is conjured this becomes the dps priority as it will just constantly deal damage while it is active. When not fighting Mornang directly, try and position the group so that it isn't in the lines where the Darkwings fly across.
When fighting Mornang and Cristhir, have one of the defensive supports be on the lookout for the grey bar inductions from the armoured morroval and stalkers. These abilities do a sizeable amount of area of effect damage if allowed to go off, but the enemies can be crowd controlled out of the inductions, drastically reducing the threat.
Once you have reduced the first boss down to 33% they will retreat back to their pillar and another boss will jump down to engage. In addition once a boss has been fought and they retreat back up to their pillar, they are unable to use their Pillar skills. This means that whoever you fight first will not use their Pillar skills until Phase 2, and even then may not use it at all depending on the tier. Once all three have been brought down to 35% then Phase 2 begins.
Phase 2
In Phase 2 you will have to fight all three of the bosses at once, which will become exceptionally chaotic as there will be overlapping mechanics going on all over the place. Commander Mornang can now use their Darkwing Flight ability even though they are in the arena with you.
In Phase 2 each boss will have most of their abilities however there are some that are unavailable:
Commander Mornang can only use Claw Puncture and Call the Legion (this is Empowered II)
Blood Sorceress Agaris can only use Blood Drain and Bleed for Me (this is Empowered II)
Cristhir the Night-shadow can only use Twist the Knife and Fan of Knives (this is Empowered II)
The main threat of this phase is going to be Blood Sorcerers Agaris as she has her Blood Pools and her Blood Drain will cause her to heal some even if interrupted right away. She should be the priority target to take out as soon as possible; ideally before she is able to cast her Bleed for Me skill 44s after the phase starts.
The second highests threat is Cristhir as she will be applying up to three of her Poisoned Knives to everyone in the arena, which is the main source of damage to the non-tanks in this fight.
Mornang is the lowest threat simply because all they can do is call in Uruks and the Troll. These will begin to run into the arena around 20s after the phase starts for the Uruks and 30s for the Troll. Have the one of the Defensive Supports can daze the troll away from where the fighting is taking place and keep it dazed the remainder of the fight. It is possible to daze it outside of the arena altogether as it is targetable and attackable as soon as it spawns in behind the pillars. The Uruks are likely the second highest source of damage for the non-tanks in this fight as their Interrupting Shout induction does a respectable amount of damage and will hit the entire arena. Tanks and Defensive Supports should be able to keep an eye on the Uruks and interrupt their inductions to drastically reduce their impact on the fight. Subsequent castings of Call the Legion will only call in enemies if they had already been defeated, so there is no threat of being over ran with enemy spawns.
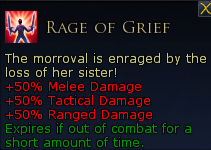
Once one of the bosses is defeated in Phase 2, the remaining bosses will gain Rage of Grief, increasing outgoing damage by +50% until combat ends. This effect can stack, causing the final boss remaining to have two such effects.
Note this effect is currently showing up as a ‘player applied’ effect and such is easily missable mixed in with all the other effects players apply to targets.
On Tier 3 a few of the existing skills get augmentations and each of the bosses gain an additional ability.
Beckon now has an area of effect (~5m radius) around the targeted player, and will spawn a Life Force for each player within that area of effect when the induction finishes. In addition, if a Life Force is consumed by Blood Sorceress Agaris then the player that spawned that Life Force is defeated.
Agaris gains Blood Storm:
Blood Storm {“Dance with me, little ones!” or “Dance, dance!”}: 4s non-interruptible induction. Deals Common damage and knocks all players away from the caster, and applies Blood Storm. Blood Storm deals Common damage every 3s and lasts until cleansed by walking into ‘the eye of the storm’. In addition, every few seconds a small knockback will take place. The center of the arena has a hotspot which will cleans the Blood Storm damage over time, as well as make you immune to the smaller knockbacks effects. The storm lasts for ~20s. This is a Melee attack.
Morroval Stalkers
This creature has no auto attacks but is summoned in stealthed. While stealthed their run speed is multiplied by x0.5.
Ambush: targets a random non-tank player, deals Common damage and stuns the target for 5s. This attack can only be used if the caster is stealthed.
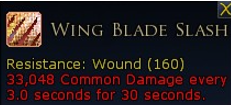
Wing Blades: 3s non-interruptible induction, deals Common damage to all players within 7m of the caster, and applies Wing Blade Slash (curable, Wound) for 30s. Wing Blade Slash deals Common damage initially and then Common damage every 3s.
Zamâktar the Putrescent
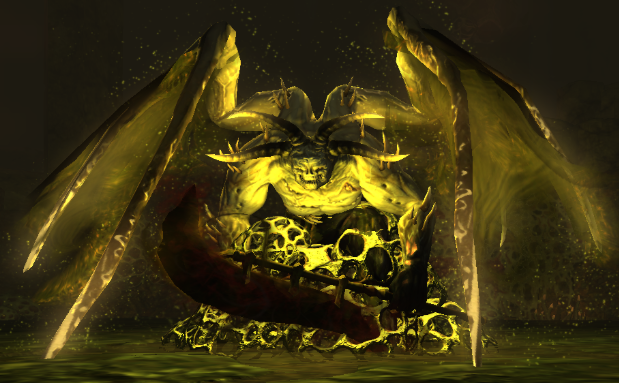
Zamâktar the Putrescent
Phase 1
In Phase 1 this creature does not move and has no auto attacks.
Axe Strike: melee (15m), standard targeting but only if target is within 10m, deals Common damage. During Phase 2 the targeting changes and can only be used against a target within 5m.
This serves as the creature's auto attack.
This attack will also occur to whoever is the next highest in the threat table if the tank moves too far from the boss.
Cruel Whip: melee (50m), standard targeting but only if target is not within 20m, deals Common damage. During Phase 2 the targeting changes and can only be used against a target that is not within 10m.
This serves as the creature's auto attack.
Blight Cleaver: 4s non-interruptible induction, standard targeting, deals Acid damage in a Line (5m wide by 50m long). This is a melee attack.
This attack will track with its target
Putrid Expulsion: standard targeting, deals Acid damage to all players and pets within a Cone (80°, 10m) and applies Putrid Spew and applies/tiers up Corrosive Spew for 30s. Putrid Spew deals Acid damage initially and then Acid damage every 3s. Corrosive Spew multiplies Run Speed by x0.9.
Corrosive Spew can tier up if applied before it has expired, in which the duration is reset to 30s, the Run Speed debuff is increased to x0.8, and tactical mitigations are reduced by -2.5%. If a player is hit with Putrid Expulsion while they have the tired up version of Corrosive Spew, then Corrosive Spew is removed and that player will take an additional spike of damage (called Poison).
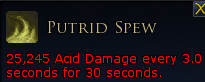
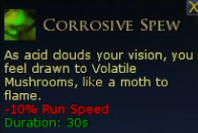
Roar Sequence
Great Roar: deals Shadow damage to all players within 60m. This is a tactical attack.
Eruption [first hit]: deals Acid damage to all players within 5m. This is a melee attack
Eruption [second hit]: deals Acid damage to all players within 15m. This is a melee attack
Devastating Eruption: deals Acid damage to all players within 60m. In addition this attack will deal an additional source of damage (called Eruption) if a player does not have the Acrid Coat effect. If you do have the Acrid Coat effect then you will be hit by a much smaller source of damage called Shielded Eruption. This is a melee attack.
The above set of skills is a chain of attacks wherein the boss will use Great Roar, then the first Eruption, then the second Eruption, followed by Devastating Eruption.
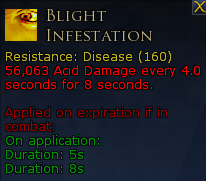
Creeping Blight Infestation: tactical (40m), targets a random player other than the current threat target, deals Acid damage and applies Blight Infestation (curable, Disease) for 8s. Blight Infestation deals Acid damage initially and then Acid damage every 4s.
On removal will deal percentage (50%) Acid damage to all players within 20m (called Moral Damage).
On removal or expiration, creates a Creeping Blight hotspot (~1m radius) which lasts for 4s, after which creates a new Creeping Blight hotspot (~2m radius) which lasts for 4s, and finally creates a new Creeping Blight hotspot (~5m radius). The final hotspot lasts until combat ends.
Phase 2
In Phase 1 this creature does not move and has no auto attacks.
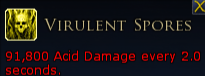
Virulent Spores: standard targeting, deals Acid damage in a Cone (120°, 20m) to all players and pets within the area. This also creates a Virulent Sports cloud in one of the quadrants of the room, which deals Acid damage every 2s and persists until combat is over.
Lhaereth’s Ire: tactical (40m), targets a random player other than the current aggro target, deals no damage but will create a random mushroom (Roiling Red Mushroom, Bloated Blue Mushroom, Yawning Yellow Mushroom) at the targeted player’s location.
Volatile Growth: tactical (40m), targets a random player, deals Acid damage and creates a Volatile Mushroom at the player’s location.
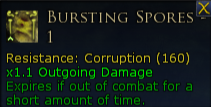
Bursting Spores: targets the caster, applies Bursting Spores (Corruption) which multiplies outgoing damage by x1.1
Roar: tactical, deals Shadow damage to all players within 60m of the caster.
Crushing Fall: deals lethal Common damage to all players and pets within 60m of the caster.
This skill can only be used if the boss has Furious Apex and is standing within a Virulent Spores hotspot. This acts as both a hard enrage mechanic for Phase 2, but also means that you can not ‘double stack’ Virulent puddles to extend Phase 2.
Crushing Blow: targets a random player other than the current threat target, deals massive Common damage in a Line (3m wide by 50m long) to all players and pets within the area. This is a melee attack.
This skill has an initial lockout time of 720s, meaning it is part of a hard enrage mechanic.
Red Spores
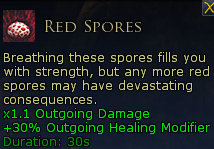
x1.1 Outgoing damage and +30% Outgoing Healing for 30s.
Strategy
There are four core mechanics at play during this fight that need to be understood and mastered in Phase 1 as they will slightly change once Phase 2 starts:
Creeping Blight Infestation
Volatile Mushrooms
Roar Sequence
Color Mushrooms
Creeping Blight Infestation
Creeping Blight Infestation is a curable Disease which will create a Blight Infestation puddle. Like most ‘puddle’ mechanics in the game these deal damage periodically while you stand in them so placement of these puddles is a priority. Unlike most of the other puddle mechanics, these puddles ‘grow’ over time. While they start off rather small in size they will increase to a standard sized puddle and since the final version of the puddle does not expire this will cause the arena to become rather cramped if placement isn't planned for. In addition, if possible time your movement so that the Blight Infestation effect expires in the desired location rather than curing it, as curing it will cause the Moral Damage burst.
Volatile Mushrooms
Volatile Mushrooms are an entity that once created can be damaged like a normal enemy and if defeated, or allowed to remain for ~20s they will burst. If they burst then all players and pets within 60m of the Volatile Mushroom (the whole arena) will gain Caustic Spores for 30s, which reduces Acid Mitigations by -10%. Once spawned there will be a short window of 3s before the Volatile Mushroom becomes ‘Primed’ (begins pulsing with yellow/green spores every 1s). Once Primed the mushroom will react violently if any player stands upon it:
If a player moves over and stands on a Volatile Mushroom then the mushroom will explode, dealing Acid damage (Acidic Burst) and applying Creeping Blight infestation (curable, Disease) to up to 15 players within 5m of the Volatile Mushroom.
If the player who stands on the Volatile Mushroom has the Corrosive Spew effect applied by the Putrid Expulsion attack, then there is no room wide burst of Blight Infestation diseases, and instead the player in question will take a spike of Acid damage (called Acidic Burst).
Regardless of the specifics, all outcomes will also remove the Volatile Mushroom from the arena.
Roar Sequence
Roar Sequence are the four sequential skills that the Zamâktar will do every 10% of its morale that it loses. This sequence will start with Great Roar, then be followed by the two Eruption skills (first hit, then second hit) and be capped off with Devastating Eruption. To avoid the high damage of the Devastating Eruption each player should gain the Acrid Coat buff from walking into any of the water pools/cracks throughout the room. The water pools/cracks do deal Acid damage initially and Acid damage over time.
This sequence of skills requires the boss to have a hidden flag, which is consumed on using Devastating Eruption. This flag is gained by the boss losing 10% of its morale. However the skills themselves also have a cooldown of 30s, and as such with high enough damage it is possible to ‘skip’ a few of the morale points when this sequence should trigger while that cooldown is in effect. Keep in mind that the cooldown is not on gaining the flag, and as such once the cooldown for the skills ends if that boss has the flag on it then the sequence will start regardless of where the boss’ morale is at that time. The voice line “my plague erupts” is the trigger for the boss gaining the flag, not necessarily for the sequence of skills to start.
Color Mushrooms
Color Mushrooms encompasses all of the Roiling Red, Bloated Blue, and Yawning Yellow Mushrooms that will periodically be created next to the boss during this fight.
If left alone these mushrooms will explode, dealing no damage but will apply their effects to any monsters within 5m. the effects applied to enemies are permanent and can stack up to 10 times.
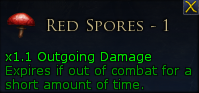
Red Spores
Increase outgoing damage by x1.1 (max x2)
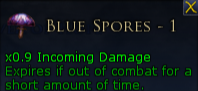
Blue Spores
Reduces incoming damage by x0.9. Subsequent stacks reduce incoming damage by an additional x0.05, resulting in a maximum of x0.45.
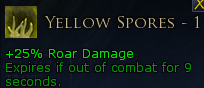
Yellow Spores
Grants +25% Roar damage (max +250%). Roar damage is the damage of any skills with Roar in the name. This includes Great Roar and Roar on Tier 1 and Terrible Roar on Tier 3.
In order to prevent Zamâktar from gaining these buffs a player can select the mushroom and ‘pick it up’. Doing so will give them an extra skill per mushroom they are carrying, and each mushroom can be held for 10s before it will automatically drop. When dropped the mushroom will apply its effects to any within 5m of where the player was located: enemies gain the buffs listed above while players gain then temporary buffs listed below:
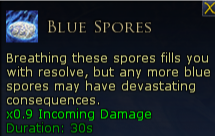
Blue Spores
Reduces incoming damage by x0.9 for 30s.
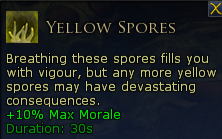
Yellow Spores
grants +10% Max Moral for 30s
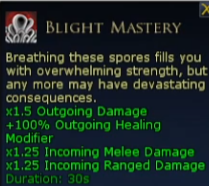
If you gain all three types of mushroom buffs at the same time, all of them are removed and you will have Blight Mastery applied to you. Blight Mastery is a very strong damage and healing buff however it will cause you to take additional melee and ranged damage. As such only the non-tanks should be in a situation where they gain Blight Mastery. Blight Mastery counts as having all three Color Mushroom buffs.
This mechanic has one major hurdle in that if you have a Color Mushroom buff active and you gain that color’s buff again then you instantly are defeated. Since Blight Mastery counts as having all three of the color’s buffs then gaining any color buff while you have Blight Mastery will also instantly defeat you.
Note that sometimes when picking up the Color Mushrooms may purge any of the color mushroom buffs including Blight Mastery from that player. This player should confirm with other players if they’re buffs had expire or not before dropping the mushrooms to avoid defeating their allies. Applying the Color Mushroom buffs to allies does show under their vitals if you have the option “Show effects cast by me” toggled.
Once you have mastered those core mechanics then Phase 1 should be relatively easy:
Designate one non-tank players to be ‘Mushroom Grabber’, for this I recommend one of the Defensive Support players.
Tanks will pick up and face the boss away from the group, standing at counter cardinals so that only one of the tanks is hit by Putrid Expulsion at a time. Once one tank is hit by Putrid, Expulsion tanks should swap aggro so that the tank with Corrosive Spew can soak any active Volatile Mushrooms.
The rest of the raid (except one of the defensive supports) stands at one of the counter cardinals, and stays grouped up enough so that everyone remains within 5m of each other.
All Creeping Blight Infestation diseases should be ran away from the group and allowed to expire along the wall. Do not pot the disease as it will deal percentage damage to everyone.
All players will need to be responsible for their Acrid Coat buff and when they need to have it. Call out when the boss is doing its Roar Sequence and to refresh the effect and no one should suffer.
When Zamâktar reaches 50% morale the fight transitions into Phase 2.
In Phase 2, Zamâktar will be mobile and able to be repositioned in the arena. Tank should move to one of the corners but be advised that it is possible for Zamâktar to use Blight Cleaver right after Phase 2 starts, and this specific casting of Blight Cleaver will not show the Area of Effect indicator lines.
Zamâktar no longer does the Roar Sequence during this phase, however will use the Roar skill every 10% moral loss if the skill is off cooldown. Yes I know this is confusing as they all have the same basic name, but it should mean that Acrid Coat is no longer required in this phase
Color Mushrooms are no longer created in groups of three, but rather are created one at a time randomly. This means that there isn't going to be a consistent means of applying Blight Mastery to the group, and it also means that its likely various players will have some of the buffs but not others. One of the Defensive Supports should stand away from the group and avoid getting the Color Mushroom buffs dropped by the other Defensive Support. This will keep them able to pick up a Color Mushroom in the case that two of the same colors are chosen back to back; dropping that mushroom safely away from anyone else. The Tank that doesn’t have threat of the of Zamâktar can also pick up a Color Mushroom and run it out of the group if needed.
Volatile Mushrooms will be spawning at the location of random players, in which everyone will need to move away from that location until the Corrosive Spewed tank can come over and soak the mechanic. Failure to move away will cause one of more additional Creeping Blight Infestations that will need to be properly managed. This attack can be sort of predicted as the boss will turn around and point its axe at a random player, who will then spawn a Volatile Mushroom.
Periodically the boss will gain its Bursting Spores corruption which should be removed as soon as possible.
During this phase the boss will begin using Virulent Spores which will begin quartering off the arena and causing the fight area to become very cramped. This effect can be predicted as the boss will have a Rising Fury effect once Phase 2 begins. Once Rising Fury expires Furious Apex will be applied which allows the boss to use their Virulent Spores skill and create the puddle in whichever quadrant Zamâktar is standing most in. Once Furious Apex expires, the boss will gain Rising Fury once more.
As such when the Virulent Spores hotspot appears move Zamâktar to another quadrant to avoid the damage.
Once all four quadrants have been covered by Virulent Spores Zamâktar will gain Rising Fury one last time after which the boss will be tagged as ‘Berserk’ (not visible) and will be able to use Crushing Fall, acting as a soft enrage to the fight. This means that while the fight as a whole may have 12minutes until Zamâktar can start using Crushing Blow and ending the fight, once you reach Phase 2 that enrage drops down to around 4mins and 45seconds until the entire arena is covered in Virulent Spores, and another 60s after that, assuming you can survive, before Crushing Fall ends the fight.
On Tier 2 this fight is very similar to Tier 1 with some slight changes to the base mechanics to punish errors.
Putrid Expulsion damage over time base damage increased by +100%. In addition, the Poison damage spike (when Corrosive Spew is applied when you already had Corrosive Spew) is replaced with Deadly Spit; dealing +1566.66% more damage than previously. This means Tanks will need to swap threat after every Putrid Expulsion.
Corrosive Spew run speed debuff magnitude increased to x0.8).
Great Roar base damage increased by +33% and will knock back all players away from the boss.
Eruption [first hit] base damage increased by +100%.
Eruption [second hit] base damage increased by +25%.
Devastating Eruption base damage increased by +33%.
Eruption [no coat] base damage is increased by +114.28%.
Shielded Eruption [had coat] base damage increased by +200%.
Acrid Coat only lasting 15s does mean that it will require more frequent reapplications to maintain or a more specific means of tracking the cooldown of Eruption to know when the skill can be used rather than when the boss gains the flag to be able to use the skill.
Creeping Blight Infestation cooldown reduced by -2s (18s cooldown) and base damage of the applicating hit increased by +50%. Damage over Time of the Blight Infestation effect increased by +33%.
Creeping Blight Hotspot initial tick base damage increased by +100% and Damage over Time base damage increased by +100%.
Lhaereth’s Ire cooldown reduced by 3s (15s cooldown).
Volatile Growth base damage increased by +50%.
Bursting Spores now applies three stacked corruptions, increasing the outgoing damage up to a maximum of x1.7 (x1.1/x1.3/x1.7).
If a Volatile Mushroom is not detonated then in addition to all players gaining Caustic Spores, all players will also gain Volatile Mushroom Acid; dealing Acid damage every 1s for 8s. This effect can stack.
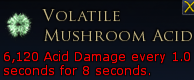
Caustic Spores magnitude increased to -20% Acid mitigations.
Acidic Burst base damage increased by +100%.
Tanks will have to swap threat of the boss after each Putrid Expulsion as getting hit by Deadly Spit will likely instantly kill the tank. This shouldn't be an issue as the tanks will want to be running about soaking the Volatile Mushrooms while they have Corrosive Spew anyways and will likely only be an issue when trying to reposition the boss during Phase 2.
The main change for Tier 2 is that there are four Color Mushrooms dropped by the boss during Phase 1. As such one of the Defensive Supports should be designated as the ‘off grabber’ and will be picking up the duplicated mushroom and running it off to safely go off away from everyone else. The other Defensive Support continues to pick up the three different Color Mushrooms and drops them on the group for the Blight Mastery buff.
Basic positioning still works with the tank holding threat pointed away from the rest of the raid, the main group all stacked up in one location, and the ‘off grabber’ and off tank standing together in a third location. This gives the main tank plenty of room to shift left or right to avoid hitting any of the Mushroom Grabbers if they are dropped on that side of the boss, while keeping the ‘off grabber from accidentally getting any of the Color Mushroom buffs and the Off Tank from getting Corrosive Spew.
In Phase 2 the fight plays out pretty much how it does in phase 1. Positioning is pretty much the same however the main group needs to be extra away from any Volatile Mushrooms that spawn on any players there, and be ready to move left or right away from it so the Off Tank can destroy it.
On Tier 3 the fight structurally remains the same but there are a number of new mechanics that add complexity and chaos on top of a tight damage requirement.
Putrid Expulsion damage over time base damage increased by +200%.
Corrosive Spew run speed debuff magnitude increased to x0.7).
Great Roar base damage increased by +66% and will knock back all players away from the boss.
Eruption [first hit] base damage increased by +200%.
Eruption [second hit] base damage increased by +50%.
Devastating Eruption base damage increased by +66%.
Eruption [no coat] base damage is increased by +185.7%.
Shielded Eruption [had coat] base damage increased by +300%.
Creeping Blight Infestation cooldown reduced by -3s (17s cooldown). Damage over Time of the Blight Infestation effect increased by +66%.
Creeping Blight Hotspot initial tick base damage increased by +300% and Damage over Time base damage increased by +200%
Volatile Growth base damage increased by +150%.
Volatile Mushrooms now spawn tethered to a Shielding Volatile Spore and can not be popped until the Shielding Volatile Spore is defeated.
Caustic Spores magnitude increased to -30% Acid mitigations.
Volatile Mushroom Acid damage over time base damage increased by +100%.
Acidic Burst base damage increased by +300%.
Lhaereth’s Ire cooldown reduced by 6s (12s cooldown).
Bursting Spores now applies five corruptions, increasing the outgoing damage up to a maximum of x3 (x1.1/x1.3/x1.7/x2.3/x3).
Shielding Volatile Spore
Has no attacks and does not move.
Spawns with a single Shielding Spores effect that must be removed before the Shielding Volatile Spore can take damage.
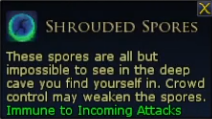
The biggest change is that if anyone is defeated at any point in this fight, a Suffocating Spore entity is created. These are similar to the Suffocating Spore entities on the path to this boss, each with two stacks of Shielding Spores that will need to be removed before it can be damaged.
there are now five Color Mushrooms that spawn, though this doesn’t change the strategy from Tier 2 as the Defensive Support that was picking up the extra mushroom can now pick up the two duplicates and drops them away from the group. There can not be any triplicated Color Mushrooms, only two sets duplicated.
With each Volatile Mushroom also now spawning with its own Shielding Volatile Spore some sort of coordination to remove the Shrouded Spores effect and defeat the Shielding Volatile Spores will need to be set up so that the process can be done quickly. I recommend one of the damage dealers, preferably ranged, be responsible for the first Volatile that spawns. This includes using a crowd control skill and then destroying the Shielding Volatile Spore. The second and third that spawn are the responsibility of the Defensive Supports and Tanks to remove the Shrouded Spores effect. Tanks will also need to keep any eye out for when a Shielding Volatile Spore is destroyed so that they can move over and soak the Volatile Mushroom; taking into account the run speed reduction that comes with having Corrosive Spew. If a Volatile spawns near a player that player needs to break all actions and move away from it. The Acidic Burst damage taken by soaking a Volatile Mushroom without Corrosive Spew can easily instantly defeat a player which can cause a cascading effect as Suffocating Spores are created.
After each Eruption Sequence (Phase 1) and use of Roar (Phase 2), Zamâktar will gain the Calcified Flesh buff, granting 20million temporary moral for 15s. While Calcified Flesh is present the entire arena will flood, rising the waters of the Caustic Pools and cause everyone to take Acid damage every 2s. In addition, if Calcified Flesh is not removed within the 15s duration all players will gain Debilitating Spores for 2minutes.
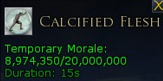
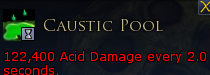
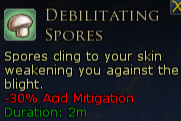
This effect can be very buggy and occasionally the Caustic Pool will remain flooding the arena even though Calcified Flesh had been removed. This has a chance to correct itself the next time Calcified Flesh is applied, but it can also perpetuate its buggy state and causing the raid to take far more damage than it should.
Positioning changes on this tier, shifting the entire raid group to the northern side of Zamâktar and having all Creeping Blight Infestation diseases dropped in on the northern wall of the arena. This is done to preserve keep locations where the group will be standing in phase two and as such the only locations Blight Infestation puddles should be are against the Northern wall, the middle under where Zamâktar is rooted in place (if a tank got the disease), and in the South East and South West corners. Specifically no puddles should be dropped where you enter the arena at.
This effect can be very buggy and occasionally the Caustic Pool will remain flooding the arena even though Calcified Flesh had been removed. This has a chance to correct itself the next time Calcified Flesh is applied, but it can also perpetuate its buggy state and causing the raid to take far more damage than it should.
Positioning changes on this tier, shifting the entire raid group to the northern side of Zamâktar and having all Creeping Blight Infestation diseases dropped in on the northern wall of the arena. This is done to preserve keep locations where the group will be standing in phase two and as such the only locations Blight Infestation puddles should be are against the Northern wall, the middle under where Zamâktar is rooted in place (if a tank got the disease), and in the South East and South West corners. Specifically no puddles should be dropped where you enter the arena at.
Phase 2 adds even more complexity as Zamâktar gains five new skills to use. Four of the new skills can only be used when Zamâktar is in a specific quadrant of the arena; however, when the phase starts Zamâktar is standing in all four quadrants at the same time and therefore has a window wherein they can use any and/or all of these skills before moving.
Only useable in North West quadrant:
Earth Shaker: melee (15m), deals high Acid damage to all players within 15m of caster).Only useable in South West quadrant
Choking Spores: melee (60m), deals Acid damage to all players with 60m of caster, and applies Choking Spores.
Choking Spores reduces mitigations by -5% and lasts until combat ends.
Missing Tooltip
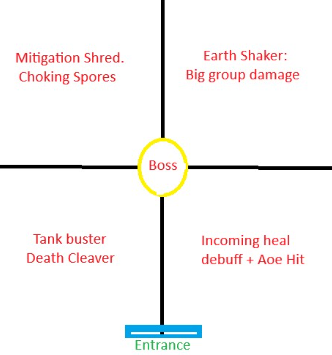
Only useable in South East quadrant
Death Cleaver: 4s non-interruptible induction, standard targeting, deals Acid damage in an Area of Effect (Line, 5m wide by 50m long). This is a Melee attack.This attack will track with its target, and as such the target will want to use some form of defensive skill.
Only useable in North East quadrant
Terrible Roar: tactical (60m), deals Shadow damage to all players within 60m, and applies Terrible Roar for 45s. Terrible Roar reduces incoming healing by -25% and can stack.
Missing Tooltip
In addition to those skills, there is a fifth skill that can be used during this phase. There are however four copies of this skill available to Zamâktar to use, one per quadrant, effectively meaning that by moving the boss into a new quadrant you reset the cooldown of the skill.
Great Double Strike: melee (10m), standard targeting, deals Common damage.
Quadrant 1: Northwestern
The Phase 2 strategy shifts beyond just moving the boss out of the Virulent Spores puddles and instead into how to manage which of the new skills Zamâktar can use when. To this end start Phase 2 with some for of Defensive cooldown such as One for All as being in the four quadrants means that any of those skills can happen. The biggest threat on the list is Earthshaker as the damage alone likely can drop a player even from full morale. Thus using One for All to mitigate any instant casts of Earthshaker. During this time the damage dealers use all of their cooldowns to do as much damage in this first quadrant as possible. Tanks move Zamâktar to the Western wall of the arena, standing just inside the quadrant so that the first Virulent Spores puddle will cover the Northwestern quadrant.
Additional things to note for this quadrant is that it is possible that a Color Mushroom spawns during this time which may be troublesome depending on when the Color Mushrooms had spawned just before the phase. Thus the tank not currently holding the boss should pick up the first Color Mushroom that spawns to remove any confusion.
The name of the game in this first quadrant is mitigating Earthshakers. Thus before the second casting use a follow up Defensive cooldown such as Warding Knowledge.
Lastly Corruption removals are key as even without buffs the damage of these extra skills is very high.
Ideally it will be time to move to the next quadrant before the third Earthshaker, but as long as there is no chance of Bursting Spores corruptions popping up just before healers should be able to mitigate the hit.
Any Creeping Blight Infestation diseases should be dropped along the Western wall or in the Southwestern corner.
Quadrant 2: Southwestern
This quadrant is far less scary as Choking Spores deals far less damage and applies a mitigation shred. This can become troublesome if Calcified Flesh bugs out and the room remains flooded, but under normal circumstances this quadrant is relatively safe. Just be sure to communicate the Color Mushroom dropping so that there is as high uptime as possible on the buffs, with a hope that the group could get Blight Mastery for the increased damage buff.
Any Creeping Blight Infestation diseases should be dropped along the Southern wall.
Quadrant 3: Southeastern
Moving to the quadrant should be the final moving Zamâktar does and as such the Tanks position themselves so that they are up against the fog wall covering the entrance. From here the main threat is to the tanks and the rest of the group just need to maintain their composure and execute the mechanics.
It is at this point that the arena is going to start to feel very claustrophobic as there wont be alot of room left to move around in.
Any Creeping Blight Infestation diseases should be dropped along the Southern wall or in the Southeastern corner.
Quadrant 4: Northeastern
This is less of a moving for Zamâktar and more so just the Tanks shifting into the new quadrant and out of the Virulent Spores now occupying the Southeastern quadrant. In doing so this minimalizes or flat out removes the Terrible Roar skill from usage and the Tanks will need to continue to manage the Death Cleavers that are periodically used.
The group is going to be in a very narrow strip of space to stand as they can not move right as that is full of Virulent Spores, and if moved too far forward then runs the risk of being hit by Putrid Spew.
Any Creeping Blight Infestation diseases should be dropped along the edge to the Northwestern quadrant (where the group was standing in phase 1) or somewhere else that is moderately safe to get to that didn’t get completely covered during phase 1.
During this last quadrant should be the timing for the final round of damage buffs which if fitting given that this is a race against the clock as once Rising Fury expires into Furious Apex, Zamâktar will induct Crushing Fall to end the fight.